CalEVV Bulk Upload
To quickly add a large number of client and employee records, use the provided Excel template (see the link below) to create and upload a builf file to the CalEVV system.
Review the following before uploading:
-
Microsoft Excel is required and macros must be enabled.
-
To learn how to enable macros, click the following link: Run a macro in Excel.
-
Use the tool tips within the spreadsheet for help when completing the required fields.
-
Watch the training videos for guidance on manually entering Client and Employee data without using bulk upload.
If an employee or client already exists in the system, including them in the bulk upload file will overwrite their existing record. Any blank fields in the bulk upload file will also overwrite existing data. Please be aware that a slight variation in data entry of an existing record (name, Unique Client Identifier (UCI)/ Client Identification Number (CIN), etc.) may result in a duplicate client/employee record being created. To avoid duplicate records, please inactivate the previous record. For steps to inactivate a client or employee, watch the manual data entry employee and client videos linked above.
To prepare the Bulk Upload file:
-
Click here to download the Bulk Upload spreadsheet.
-
Open the spreadsheet and enable editing.
-
Make sure you have Macros enabled in Excel.
-
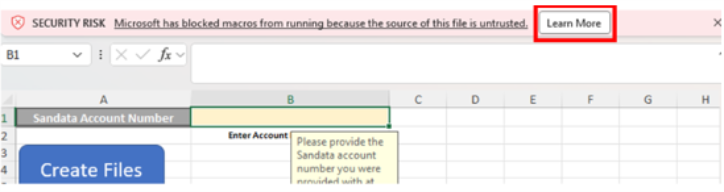
Select Learn More for more information or follow the steps below if you see this message:
-
Steps to unblock macros by modifying the properties of the file as follows:
-
Save the spreadsheet on your computer and close the file.
-
Open Windows File Explorer and go to the folder where you saved the file.
-
Open the saved file, select Enable Content.

-
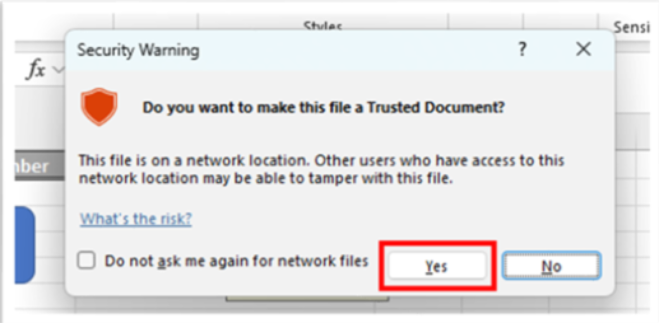
Select Yes to confirm the spreadsheet is a trusted document.
-
Begin entering data.
-
-
-
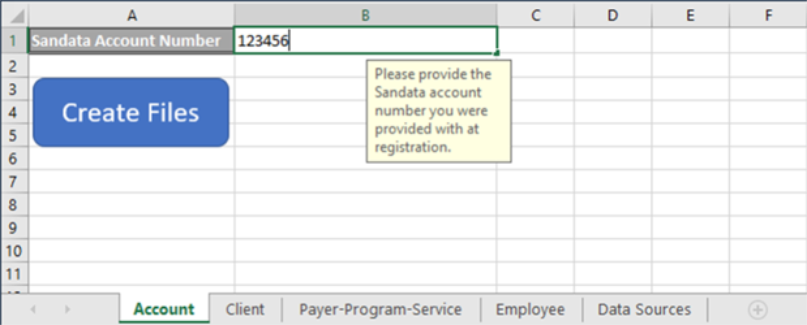
Enter your STX account number in the Account tab in column B.
-
This is going to be the STX account number used to log into CalEVV systems.
-
-
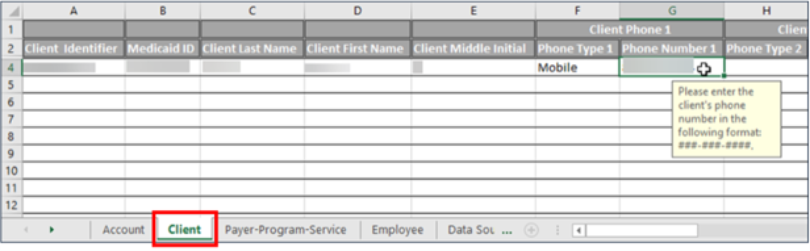
Select the Client or Employee tab.
-
Enter all Client or Employee information. Follow the requirements indicated by the tool tips.
-
The Client tab is selected in the example below.
-
-
Enter the Client information. Follow the requirements indicated by the tool tip.
-
Client Identifier or Medicaid ID:
-
For Department of Health Care Services, California Department of Aging, California Department of Public Health, and California Department of Social Services: Enter the CIN in either column A or B. Format: 8 digits starting with a 9 and ending with a capital alpha.
-
For Department of Developmental Services: Enter the UCI in either column A or B. Format: 7 digits.
-
-
-
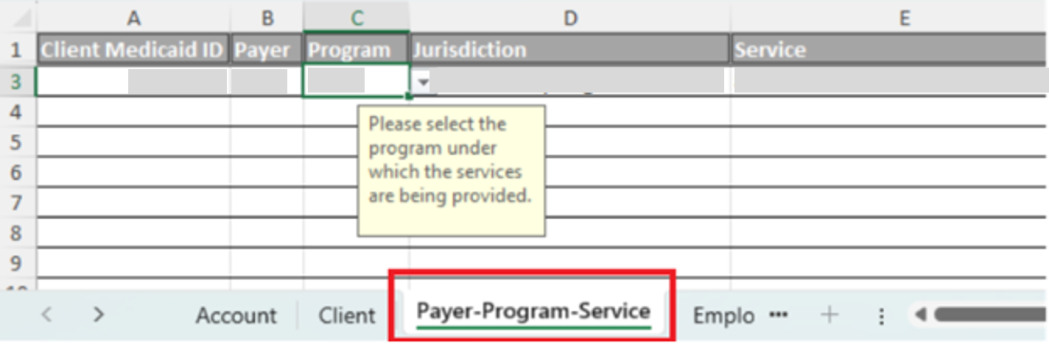
Select the Payer-Program-Service tab. This must be done for each client entered.
-
Enter the correct data manually and select the available choices using the dropdown feature.
-
Important: The Payer must match the Program selection, either Home Health Care Services (HHCS) or Personal Care Services (PCS).
-
HHCS Programs: Select Payers that are affiliated with HHCS.
-
PCS Programs: Select Payers that are not affiliated with HHCS.
-
-
-
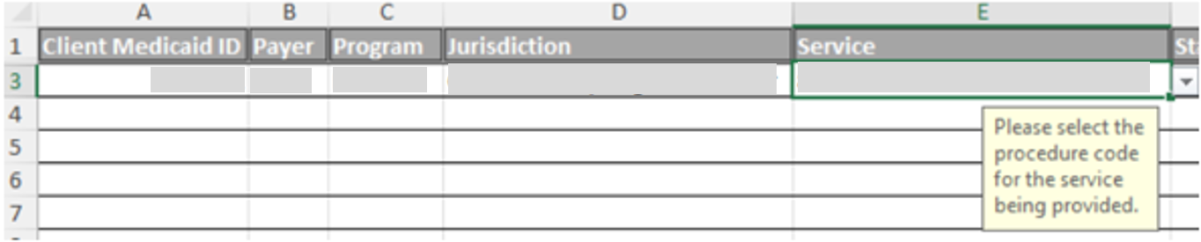
In Column E of the worksheet, enter the client service authorization information.
-
This identifies the service the client is authorized for based on their CIN (for DHCS, CDA, CDPH, and CDSS) or UCI (for DDS only) and jurisdiction.
NOTE: End Date is not required.
-
-
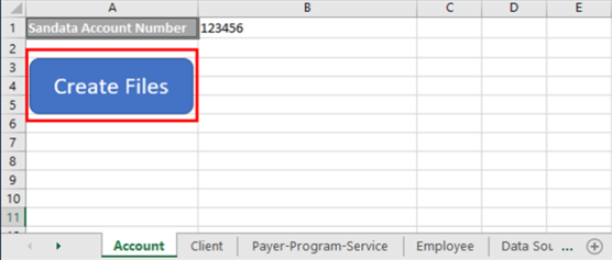
Select the Account tab.
-
Select Create Files.
-
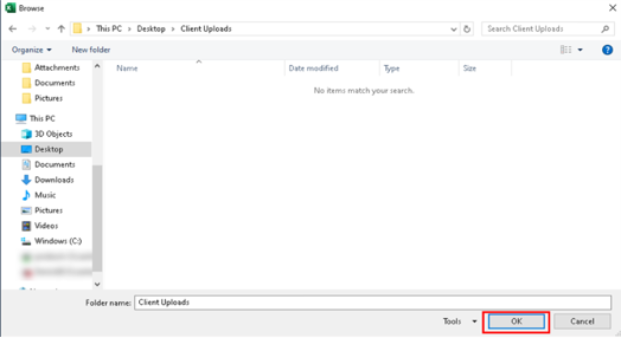
Select a location to save and upload the file. Select OK.
-
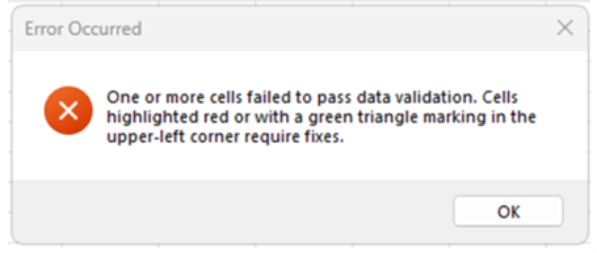
If your data contains errors, you will receive and error message.
-
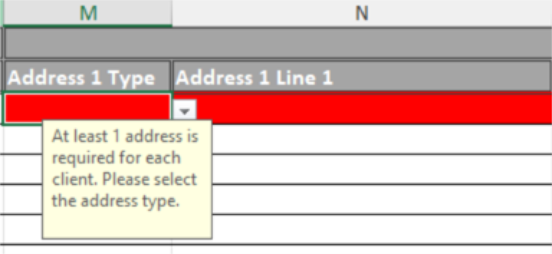
Review the Client, Payer-Program-Service, and Employees tabs for errors, which are highlighted in red.
-
See missing address example below.
-
-
Once you have successfully entered the information, log into your CalEVV portal to complete the bulk upload.
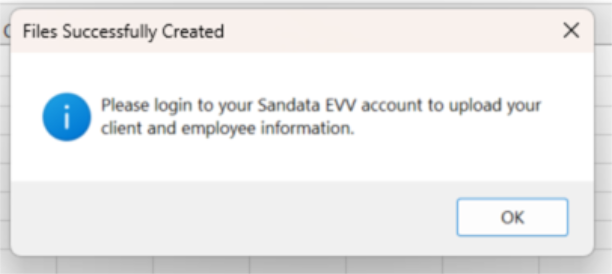
To upload the file:
-
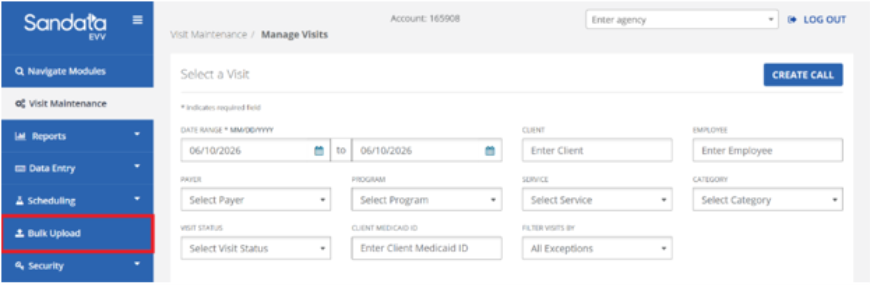
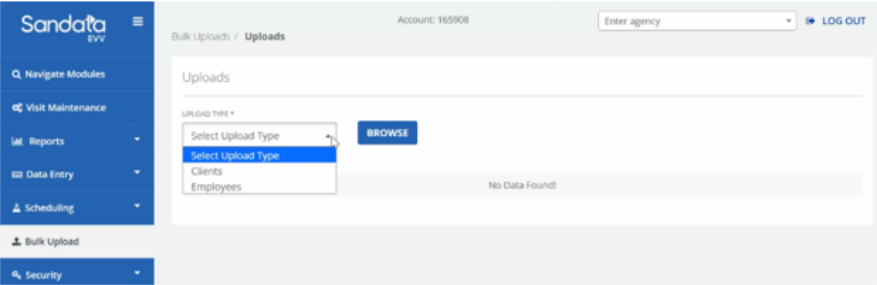
Once logged in, select the Bulk Upload tab located on the left side of the screen.
-
Select Upload Type > Client or Employee information. Then select Browse to upload your file.
-
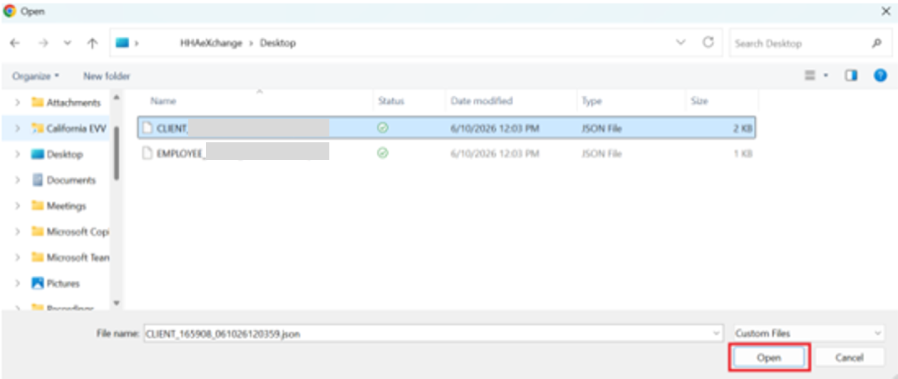
Choose the correct file from your computer. Select Open to begin the upload.
-
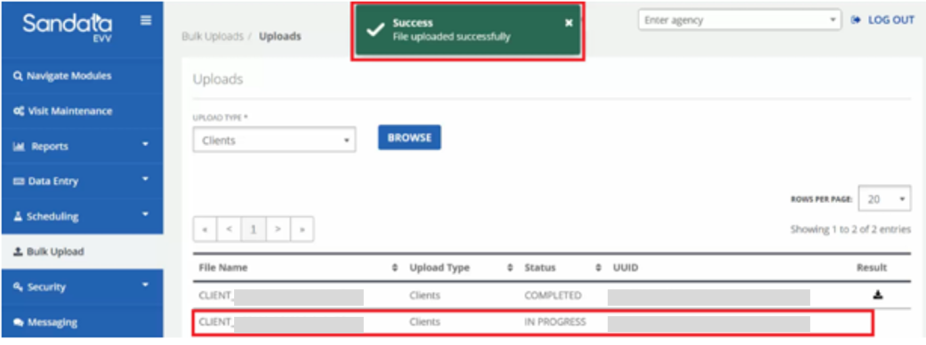
A green success banner will appear. The upload will be completed after processing. Timing will vary based on the file size.

|
Error |
Possible Cause | Solution |
|---|---|---|
|
A Medicaid ID is highlighted red. |
Medicaid ID value does not meet validation rules. | Make sure each Medicaid ID and Client Identifier match and are correctly formatted as a CIN (9 + 8 digits + capitalized letter) or UCI (7 digits) |
| The same Medicaid ID is listed more than once. | Remove one of the duplicates . | |
| One of the client Medicaid IDs listed does not have any corresponding entries in the Payer-Program-Service tab. | All clients in the Client tab must have at least one entry in the Payer-Program-Service tab, and every entry in the Payer-Program-Service tab must correspond to one client in the Client tab. Remove the client from the Client tab or add an entry for the client in the Payer-Program-Service tab. | |
| An Address Line field is highlighted red. | The field value is too long. | Address lines must be 30 or fewer characters. Consider abbreviating or moving apartment, suite, or unit numbers from Line 1 to Line 2. |
|
Error |
Possible Cause | Solution |
|---|---|---|
|
A Medicaid ID value is highlighted red. |
The client is not listed in the Client tab. | Every entry in the Payer-Program-Service tab must correspond to one client in the Client tab. Add the client to the Client tab or remove any entries for the client in the Payer-Program-Service tab. |
| A Program value is highlighted red. | The payer and program do not align. |
If the Program you select is HHCS, make sure to select the HHCS version of the payer name as well. Examples:
|
| A Jurisdiction is highlighted red. | The incorrect jurisdiction has been selected. | Several jurisdictions have similar names. Double-check that you have selected the correct jurisdiction. |
| A Service is highlighted red. | The incorrect service has been selected. | Several services use the same code but have different names. Double-check that you have selected the version of the service code appropriate for your payer and program. |
| The service is not available for the selected payer and program. | Double-check your payer and program are correct and that you have selected the correct service. |