Sandata I/DD Administration
Scheduling Location Groups
Administrators can manage the scheduling location groups that they can then use when setting up staff scheduling security. In order for the Schedule Manager to view the schedule for multiple scheduling locations at the same time, the Administrator must first set up scheduling location groups and assign them to the correct Schedule Managers (if the Schedule Manager cannot schedule all locations).
Do not add, delete, or make changes to the scheduling location group settings within Staff Scheduling if you sync from ProviderPro. The changes will be overwritten the next time the sync runs. Make all changes in ProviderPro. To make scheduling location group read only in Staff Scheduling turn on the Disable Default Synced Properties setting in Options.

To manage scheduling location groups:
-
Select Setup on the menu and then select Scheduling Location Groups on the Staff Scheduling Setup card.

-
Select the Add option or the card you want to update.

The scheduling location group opens.

-
Next, complete the following information and select Save:
In this field: Enter: Description A description of the scheduling location group. Active The scheduling location group is in use. If this is a new scheduling location group, the Scheduling Locations, Approved Staff, Location Managers and Scheduling Managers cards appear.

-
Select Add on the Scheduling Locations card.

The Scheduling Locations pop-up opens.
-
Select the scheduling locations you want to assign to the scheduling location group and then select the Save button.

-
Select the minus sign next to a scheduling location to remove it from the scheduling location group.

A confirmation message appears.
-
Next, select Yes.
The scheduling location disappears from the card.
-
Next, select Add on the Approved Staff card.
The Approved Staff window opens.
-
Select the staff that are approved to work at the scheduling locations in this scheduling location group and then select Save.
-
Select the minus sign next to an approved staff to remove it from the scheduling location group.
A confirmation message appears.
-
Select Yes.
The approved staff disappears from the card.
-
Select Add on the Location Managers card.
The Location Managers window opens.
-
Select the employees that can manage the scheduling locations (shift templates, qualifications, etc.) in this scheduling location group and then select Save.
-
Select the minus sign next to a location manager to remove it from the scheduling location group.
A confirmation message appears.
-
Select Yes.
The location manager disappears from the card.
-
Select Add on the Scheduling Managers card.
The Scheduling Managers pop-up opens.
-
Select the employees that can create schedules for the scheduling locations in this scheduling location group and then select Save.
-
Select the minus sign next to a Scheduling Manager to remove it from the scheduling location group.
A confirmation message appears.
-
Select Yes.
The Scheduling Manager disappears from the card.
DataPlus security is role-based. Only Administrators can assign security roles to staff and managers. The role assigned to the user determines what tasks the user can perform.
Administrators can verify a staff's security and configuration settings by running the Time Tracking Staff Configuration report.
Everyone can:
-
Log in
-
Change passwords
-
Enter contact information and staff notification settings
-
Read/send messages
Review each dropdown below for a list of roles and permissions.
Those users with the Staff Scheduling Staff role can:
-
Set hours and scheduling location preferences
-
Set up availability (if Allow Staff to Maintain Availability is turned on in Options)
-
Review scheduled shifts
-
View the schedules for approved scheduling locations
-
Pick up open or posted shifts
-
Post shifts to allow other staff to pick up
-
Call off shifts (if Allow Staff to Call Off is turned on in Options)
-
Find a substitute for a shift (if Allow Staff to Find Substitute is turned on in Options)
-
Submit/cancel time off requests
-
View PTO balances
-
View auditing information
Those users with a Time Tracking Staff Permission Group can:
-
Clock In/Out (if Use Clock In/Out Screen is set in their Staff Permission Group)
-
Add log transactions
-
Edit, void and unvoid unapproved log transactions
-
Add and view notes
-
View flags
-
View audit information
Staff Managers have either the Staff: Manage All or Staff: Manage Selected role. If the role set is Staff: Manage Selected, then the specific staff must be set up on the Staff: Manage Selected card as well. Staff Managers can:
-
Set staff manager notification settings
-
Add (if Allow Managers to Add Approved Time Off is turned on in Options), approve and reject staff time off requests
-
Assign user-defined qualifications and qualification expiration dates to staff
-
Assign staff to approved scheduling locations
-
Set preferred company hours for staff
-
Exclude any clients from staff for scheduling purposes
-
Maintain staff availability (if Allow Managers to Maintain Availability is set in Options)
-
Maintain staff contact information and notification settings (if Allow Managers to Maintain Contact Information and Allow Managers to Maintain Notification Settings are set in Options)
-
View staff schedules
-
Review staff satisfaction index
Client Managers have either the Clients: Manage All or Clients: Manage Selected role. If the role set is Clients: Manage Selected, then the specific Clients must be set up on the Clients: Manage Selected card as well. Client Managers can:
-
Set Client Manager notification settings
-
Update Client information
-
Add qualifications to Clients for scheduling purposes
-
Assign Clients to scheduling locations
-
Exclude staff from working with Clients for scheduling purposes
Scheduling Location Managers have either the Scheduling Locations: Manage All or Scheduling Locations: Manage Selected role. If the role set is Scheduling Locations: Manage Selected, then the specific Scheduling Locations must be set up on the Scheduling Locations: Manage Selected card as well. Scheduling Location Managers can:
-
Create/manage shift templates
-
Add new scheduling locations
-
Maintain scheduling location information
-
Assign qualifications to scheduling locations
-
View schedules
-
View auditing information
Schedule Managers have either the Scheduling Locations: Schedule All or Scheduling Locations: Schedule Selected role. If the role set is Scheduling Locations: Schedule Selected, then the specific scheduling locations must be set up on the Scheduling Locations: Schedule Selected card as well. Schedule Managers can:
-
Set schedule manager notification settings
-
Copy shifts from previous week
-
Generate shifts from shift templates
-
Add/change/inactivate shifts
-
Assign, reassign or unassign staff from time slots
-
Auto-schedule staff
-
Publish schedules
-
Review schedule status
-
Acknowledge/unacknowledge flags
-
Accept/reject change requests
-
View shift templates
-
View auditing information
View Log Managers have either the Logs: View All or Logs: View Selected role. If the role set is Logs: View Selected, then the specific staff (on the Staff Logs: View Selected card), Service Locations (on the Service Location Logs: View Selected card)and/or Payroll Cost Centers (on the Cost Center Logs: View Selected card) must be set up as well.
The logs for the staff selected on the Staff Logs: View Selected card will appear in the Managed Staff area of the Staff Log screen. If a log transaction is entered for a payroll cost center selected on the Cost Center Logs: View Selected card or for a service location selected on the Service Location Logs: View Selected card and the staff is not also selected on the Staff Logs: View Selected card, then those logs will appear in the Non Managed Staff area of the Staff Log screen. If Logs: View All is selected, then the logs for all staff will appear under Managed Staff.
View Log Managers can view:
-
Clock transactions
-
Log transactions
-
Flags
-
Notes
-
Audit information
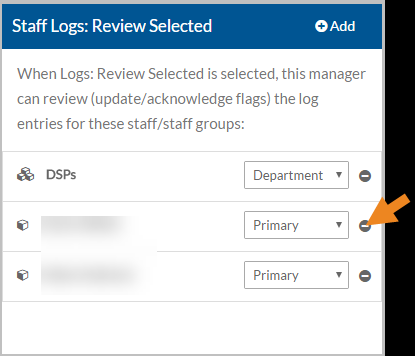
Review Log Managers have either the Logs: Review All or Logs: Review Selected role. If the role set is Logs: Review Selected, then the specific staff (on the Staff Logs: Review Selected card), Service Locations (on the Service Location Logs: Review Selected card) and/or Payroll Cost Centers (on the Cost Center Logs: Review Selected card) must be set up as well. Review Log Managers do not need either of the View Log Manager roles.
The logs for the staff selected on the Staff Logs: Review Selected card will appear in the Managed Staff area of the Staff Log screen. If a log transaction is entered for a payroll cost center selected on the Cost Center Logs: Review Selected card or for a service location selected on the Service Location Logs: Review Selected card and the staff is not also selected on the Staff Logs: Review Selected card, then those logs will appear in the Non Managed Staff area of the Staff Log screen. If Logs: Review All is selected, then the logs for all staff will appear under Managed Staff.
Review Log Managers can:
-
Add clock transactions and log transactions
-
Edit, void and unvoid unapproved clock and log transactions
-
Acknowledge and unacknowledge flags
-
Add and view notes
-
View audit information
Approve Log Managers have either the Logs: Approve All or Logs: Approve Selected role. If the role set is Logs: Approve Selected, then the specific staff (on the Staff Logs: Approve Selected card), Service Locations (on the Service Location Logs: Approve Selected card)and/or Payroll Cost Centers (on the Cost Center Logs: Approve Selected card) must be set up as well. Approve Log Managers do not need any of the View Log Manager or Review Log Manager roles.
The logs for the staff selected on the Staff Logs: Approve Selected card will appear in the Managed Staff area of the Staff Log screen. If a log transaction is entered for a payroll cost center selected on the Cost Center Logs: Approve Selected card or for a service location selected on the Service Location Logs: Approve Selected card and the staff is not also selected on the Staff Logs: Approve Selected card, then those logs will appear in the Non Managed Staff area of the Staff Log screen. If Logs: Approve All is selected, then the logs for all staff will appear under Managed Staff.
Approve Log Managers can:
-
Add clock transactions and log transactions
-
Edit, void and unvoid unapproved clock and log transactions
-
Acknowledge and unacknowledge flags
-
Add and view notes
-
Approve and unapprove clock and log transactions
-
View audit information
Setup Managers have the Setup role.
Setup Managers can add/change and delete the setup items for all DataPlus setup lists (depending on licensing):
-
Options
-
Billing processing groups
-
Billing time service types
-
Billing unit service types
-
Client groups
-
Data collection types
-
Data-entry service location groups
-
Devices
-
General ledger accounts
-
General ledger cost centers
-
Manager service location groups
-
Note prefills
-
Payroll cost center groups
-
Payroll cost centers
-
Payroll job titles
-
Payroll tasks
-
Payroll wage types
-
Qualification categories
-
Qualifications
-
Scheduling location groups
-
Service locations
-
Service types
-
Staff groups
-
Staff permission groups
-
Time off reasons
Exporters have the Export Approved role. Exporters can create an export file that will be imported into ProviderPro Billing or Payroll for further processing. They can also roll back exports and archive them. Finally, exporters have access to the Unapproved Transactions By Primary Manager report.
Administrators have the Administrator role. Administrators can assign security roles to users.
The various manager roles also have a manager type. Managers can either be a Primary or Department manager. By default, all managers are set to be Primary managers.
-
The Primary manager has direct responsibilities for their staff, clients, schedule locations, schedules and/or Time Tracking logs. The Primary managers can receive designated notifications based on their Contact Information, Notification (Staff Manager, Client Manager or Schedule Manager) Settings and Out of Office Settings.
-
The Department manager is indirectly responsible for their staff, clients, schedule locations, schedules and/or Time Tracking logs. Department managers never receive notifications.
-
If the manager is the department manager for some and the primary manager for others, they will be set up with a selected role and the manager type will be set as appropriate per staff, scheduling location, payroll cost center and/or service location.
Managers can then filter their staff, clients, scheduling locations, staff logs and/or service location logs based on the manager type.
The staff security roles set the security permissions for the staff when using DataPlus as a staff member and not a manager.
These steps are for those agencies that are not syncing their security settings from ProviderPro or Employee Care. These settings may be read-only for those agencies that are syncing and are instead maintained either on the DataPlus Sync tabs of the Employee in ProviderPro or the Time Tracking/Staff Scheduling Sync tab of the Employee screen in Employee Care depending on your agency’s configuration.
For more information see:
-
Maintaining Security from ProviderPro Employee
-
Maintaining Security from Employee Care Employee
To set up staff security:
-
Select Staff from the menu or if you have Client Care, select Employee Care from the menu and then select Employees.
-
Enter the name of the staff you want to assign security roles to in the Search box.

-
Select the card of the staff.
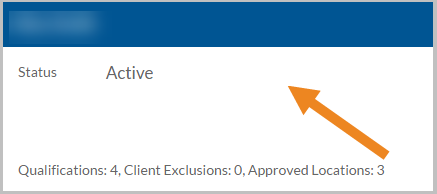
The staff's card opens.
-
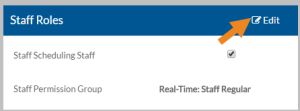
Select Edit on the Staff Roles card.
-
Select or clear the appropriate security role(s) as follows and select Save:
Role Description Staff Scheduling Staff If the agency has licensed staff scheduling and this user will be scheduled for shifts. Staff Permission Group If the agency has licensed time tracking and this staff will be recording time worked and non-worked, mileage and/or expenses, select the Staff Permission Group to associate with this user. The user will be able to clock in/out and log tasks, services, mileage and expenses based on the settings and data collection types of the selected Staff Permission Group. The Log Viewers, Log Reviewers and Log Approvers cards will appear. -
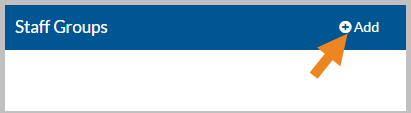
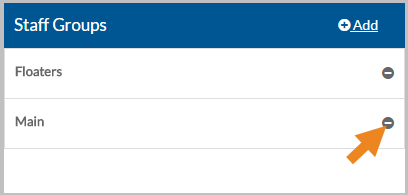
Select Add on the Staff Groups card to assign the staff to a Staff Group.
If you have licensed client care or employee care and are using global locations, you will not see Staff Groups. Your configuration is set to use Employee Groups instead found on the Employment Information tab. Your staff security setup is complete.
-
Select the staff group(s) for this staff and then select the Save button.
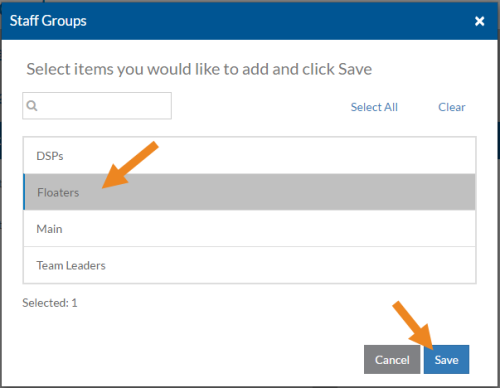
The staff group(s) now appear on the card. The managers assigned to the selected Staff Groups will appear on the Staff Managers, Log Viewers, Log Reviewers and/or Log Approvers cards with the name of the Staff Group in parentheses.
-
Select the minus sign next to the staff group to remove it from Staff Groups.
A confirmation message appears.
-
Select Yes.
The staff group no longer appears on the Staff Groups card. The associated managers will disappear from the Staff Managers, Log Viewers, Log Reviewers and/or Log Approvers cards.
If you sync your security settings from ProviderPro or Employee Care, you are finished.
-
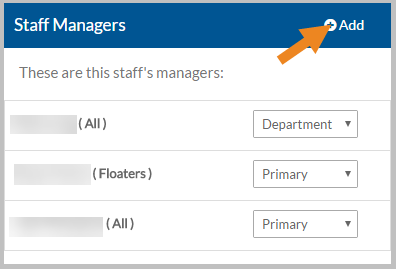
Select Add on the Staff Managers card to assign a staff manager to this staff.
The Staff Manager can approve/deny time off requests and update staff information.
The Staff Managers window opens.
-
Select either Primary Managers or Department Managers and select the Next button.
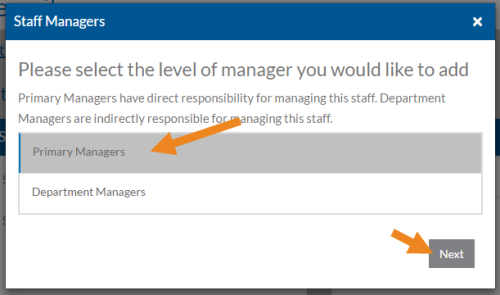
Primary Managers have direct responsibility for managing this staff. Department Managers are indirectly responsible for managing this staff.
-
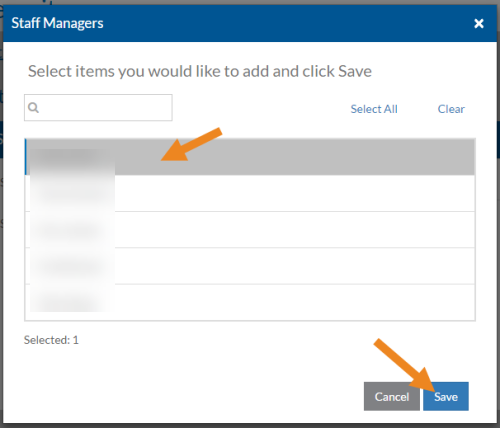
Select the Staff Managers that manage this staff and then select the Save button.
Only managers that have the Manage Selected Staff role appear in the list.
The Staff Manager(s) now appear on the card and you can change the Manager Type if needed.
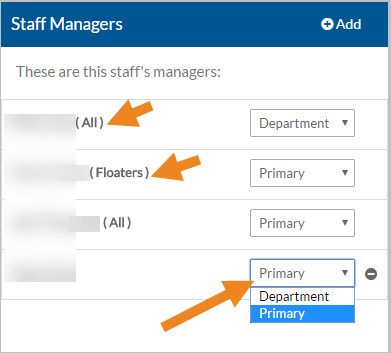
If the staff manager manages this staff because he or she has the Manage All Staff role or manages a staff group that this staff is a member of, then the manager's name will appear as read-only on the card and is managed via the DataPlus Roles card or the Staff Groups assigned to this staff.
-
Select the minus sign next to the staff manager to remove him or her from Staff Managers.
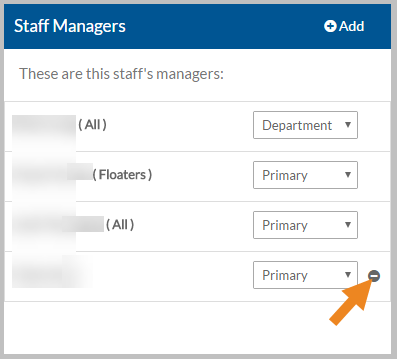
A confirmation message appears.
-
Select Yes.
The Staff Manager no longer appears on the Staff Managers card.
-
If the staff is assigned a Staff Permission Group, select Add on the Log Viewers card to assign a View Log Manager to this staff.
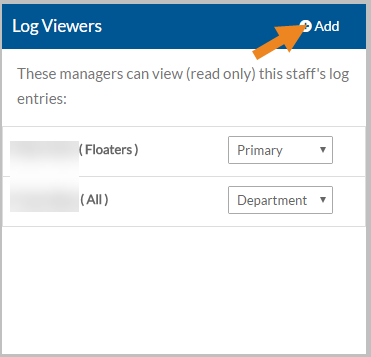
The View Log Managers window opens.
-
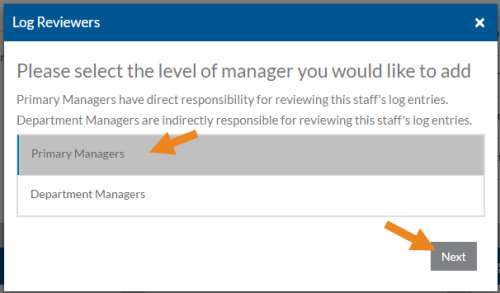
Select either Primary Managers or Department Managers and select the Nextbutton.
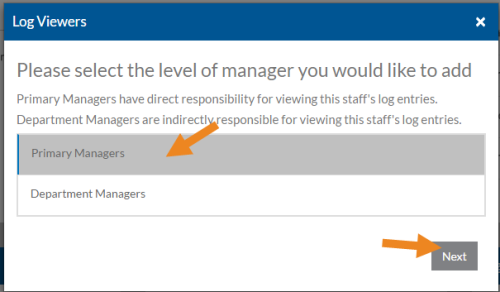
Primary Managers have direct responsibility for viewing the Staff Log for this staff. Department Managers are indirectly responsible for viewing the Staff Log for this staff.
-
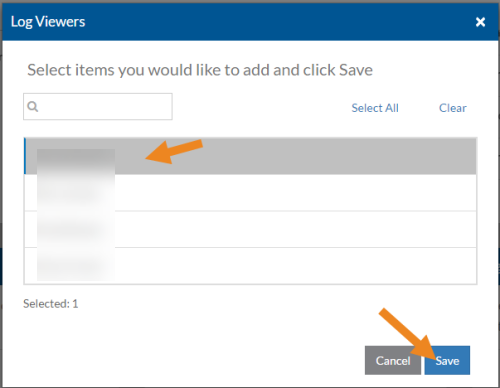
Select the View Log Managers that view the Staff Log for this staff and then select Save button.
Only managers that have the View Selected Staff role appear in the list.
The View Log Managers now appear on the card and you can change the manager type if needed.
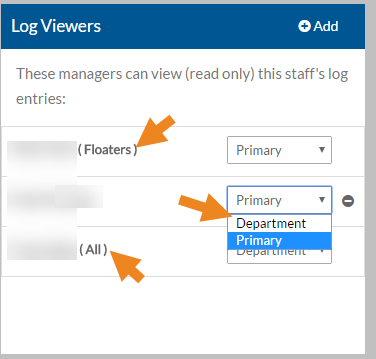
If the view log manager manages this staff because he or she has the View All Logs role or can view the logs of a staff group that this staff is a member of, then the view log manager's name will appear as read-only on the card and is managed via the Time Tracking Manager Roles card or the Staff Groups assigned to this staff.
-
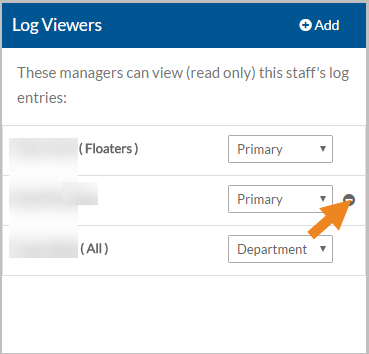
Select the minus sign next to the manager to remove him or her from Log Viewers.
A confirmation message appears.
-
Select Yes.
The View Log Manager no longer appears in the Log Viewers card.
-
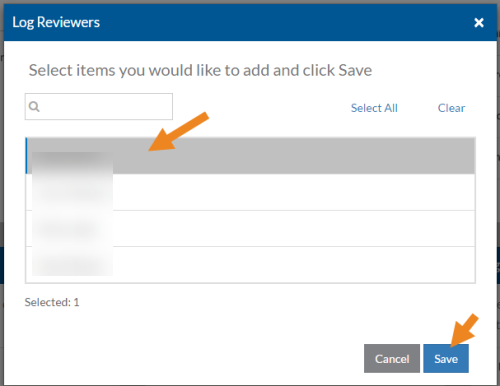
If the staff is assigned a Staff Permission Group, select Add on the Log Reviewers card to assign a Review Log Manager to this staff.

The Review Log Managers window opens.
-
Select either Primary Managers or Department Managers and select the Next button.
Primary Managers have direct responsibility for reviewing the Staff Log for this staff. Department Managers are indirectly responsible for reviewing the Staff Log for this staff.
-
Select the Review Log Managers that review the Staff Log for this staff and then select the Save button.
Only managers that have the Review Selected Staff Logs role appear in the list.
The Review Log Manager now appear on the card and you can change the manager type if needed.
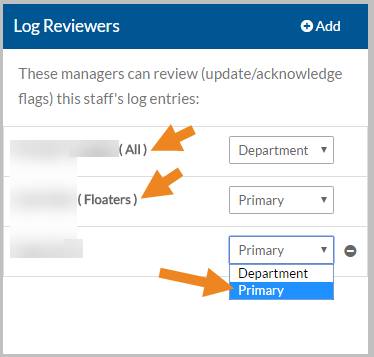
If the Review Log Manager review the Staff Log for this staff because he or she has the Review All Logs role or can review the Staff Logs for a staff group that this staff is a member of, then the review log manager's name will appear as read-only on the card and is managed via the Time Tracking Manager Roles card or the Staff Groups assigned to this staff.
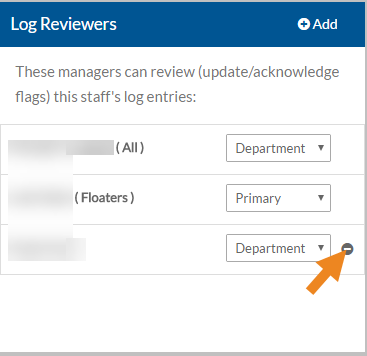
-
Select the minus sign next to the manager to remove him or her from Log Reviewers.
A confirmation message appears.
-
Select Yes.
The Review Log Manager no longer appears in the Log Reviewers card.
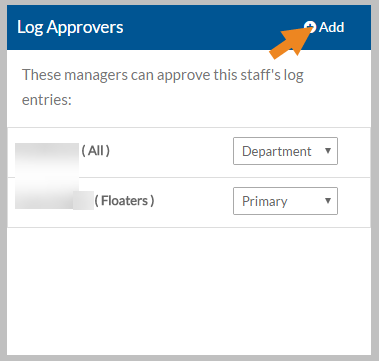
-
If the staff is assigned a Staff Permission Group, select Add on the Log Approvers card to assign an approve log manager to this staff.
The Approve Log Managers window opens.
-
Select either Primary Managers or Department Managers and select the Next button.
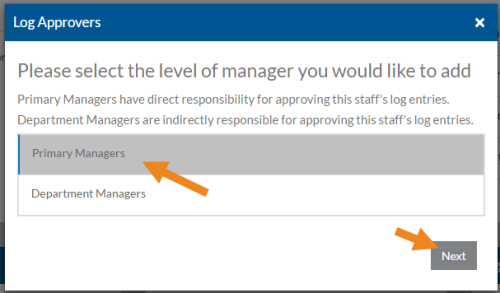
Primary Managers have direct responsibility for approving the Staff Log for this staff. Department Managers are indirectly responsible for approving the Staff Log for this staff.
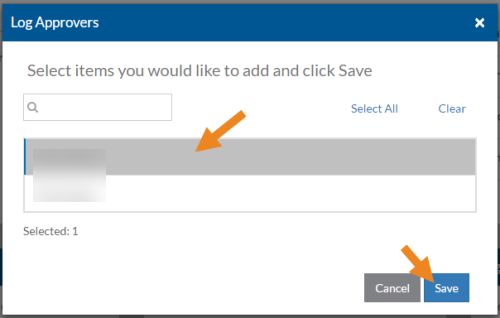
-
Select the approve log managers that approve the Staff Log for this staff and then select the Save button.
Only managers that have the Approve Selected Staff Logs role appear in the list.
The Approve Log Managers now appear on the card and you can change the manager type if needed.
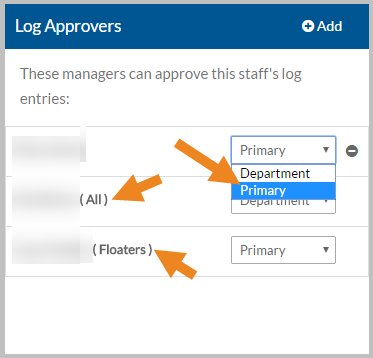
If the approve log manager approves the Staff Log for this staff because he or she has the Approve All Logs role or approves the Staff Logs for a staff group that this staff is a member of, then the approve log manager's name will appear as read-only on the card and is managed via the Time Tracking Manager Roles card or the Staff Groups assigned to this staff.
-
Select the minus sign next to the approve log manager to remove it from Log Approvers.
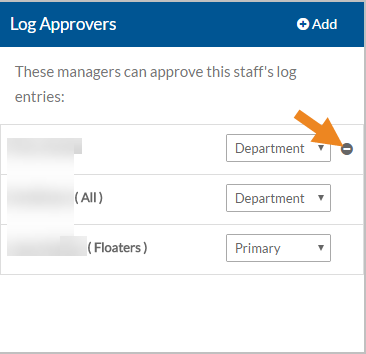
A confirmation message appears.
-
Select Yes.
The Approve Log Manager no longer appears in the Log Approvers card.
The Client Manager, Employee Manager, Administrator and Setup Manager security roles apply to both Time Tracking and Staff Scheduling.
These steps are for those agencies that are not syncing their security settings from ProviderPro or Employee Care. These settings may be read-only for those agencies that are syncing and are instead maintained either on the DataPlus Sync tabs of the Employee in ProviderPro, the Time Tracking/Staff Scheduling Sync tab of the Employee screen in Employee Care or the Position in Employee Care depending on your agency’s configuration.
For more information see:
-
Maintaining Security from ProviderPro Employee
-
Maintaining Security from Employee Care Employee
-
Maintaining Security from Positions (Step 10)
There are few security settings that can only be maintained on the Security or Time Tracking/Staff Scheduling Security tab:
-
Administrator (if not syncing from Positions) - Step 6
-
Setup Manager (if not syncing from Positions) - Step 6
To set up DataPlus security for users:
-
Select Staff from the menu or if you have Client Care, select Employee Care from the menu and then select Employees.
-
Enter the name of the employee that you want to assign security roles to in the Search field.

-
Select the card of the staff.

The staff's card opens.
-
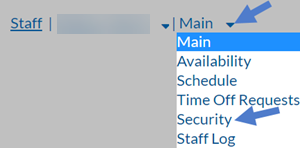
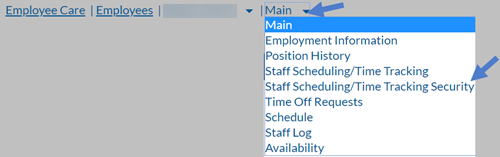
Select Security from the Main menu. If you have Client Care, select Staff Scheduling/Time Tracking Security instead.
-
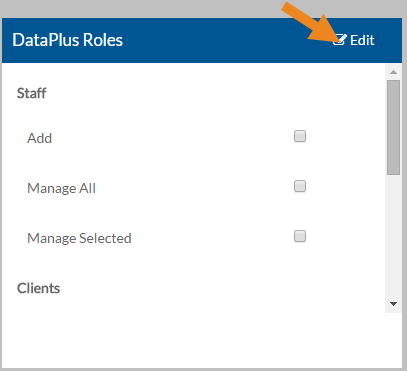
Select Edit on the DataPlus Roles card.
-
Select or clear the appropriate security role(s) as follows:
Role Description Staff: Add Staff Add new staff/users to DataPlus.
Note: Only assign this role if you do NOT sync employees from ProviderPro
Staff: Manage All Update all staff and approve/deny time off requests Staff: Manager Type If Staff: Manage All is selected, the Manager Type appears. The primary manager has direct responsibility for managing all staff. The department manager is indirectly responsible for managing all staff. Staff: Manage Selected Update specific staff approve/deny time off requests. You will also need to assign staff via the Staff: Manage Selected card Step 6.
Clients: Add Add new Clients to DataPlus.
Note: Only assign this role if you do NOT sync clients from ProviderPro
Clients: Manage All Update information (qualifications and scheduling locations) for all Clients Clients: Manager Type If Clients: Manage All is selected, the Manager Type appears. The primary manager has direct responsibility for managing all clients. The department manager is indirectly responsible for managing all clients. Clients: Manage Selected Update information (qualifications and scheduling locations) for specific clients. You will also need to assign those clients via the Clients: Manage Selected card. Go on to Step 11.
Clients: Delete Delete a client from Staff Scheduling
Note: Only assign this role if you do NOT sync clients from ProviderPro
Administrator Perform all DataPlus tasks including setting up security.
Setup Add, Edit and Delete Setup information. -
If Staff: Manage Selected is marked, select Add on the Staff: Manage Selected card.
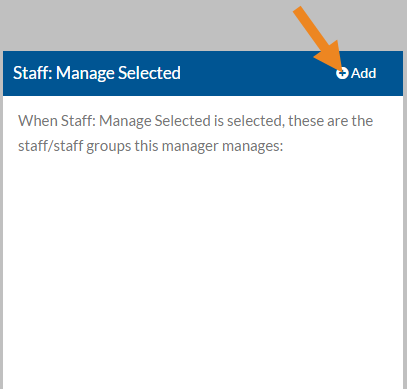
The Staff: Manage Selected window opens.
-
Select either Primary Managers or Department Managers and select the Next button.
Primary Managers have direct responsibility for managing the staff/staff groups selected in the next screen. Department Managers are indirectly responsible for managing the staff/staff groups selected in the next screen.
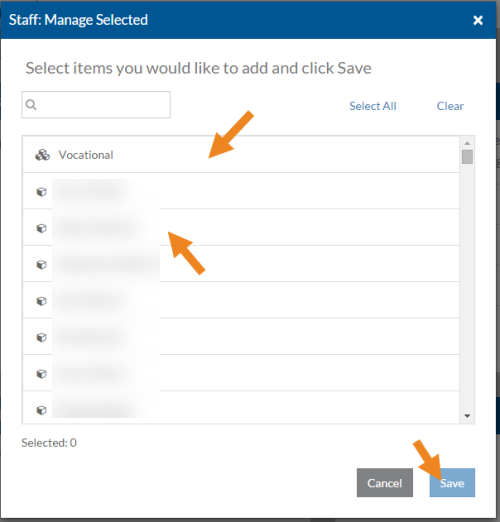
-
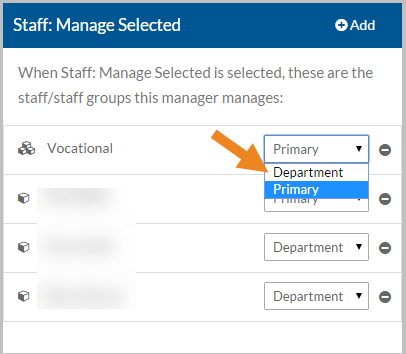
Select the staff and/or staff groups that this user manages and then select the Save button.
The staff/staff groups appear on the card and you can change the manager type if needed.
-
Select the minus sign next to the staff or staff group to remove it from the Staff: Manage Selected card.
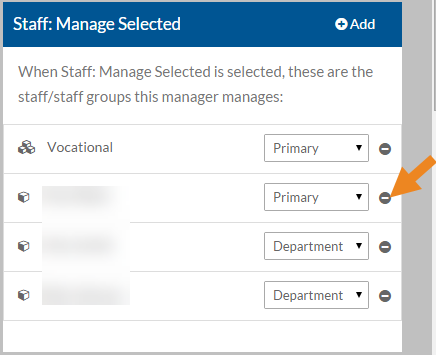
A confirmation message appears.
-
Select the Yes button.
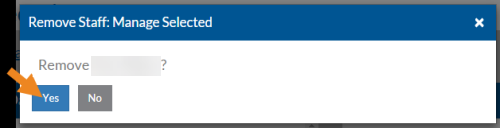
The staff or staff group no longer appears in the Staff: Manage Selected card.
-
If Clients: Manage Selected is marked, then select Add on the Clients: Manage Selected card.
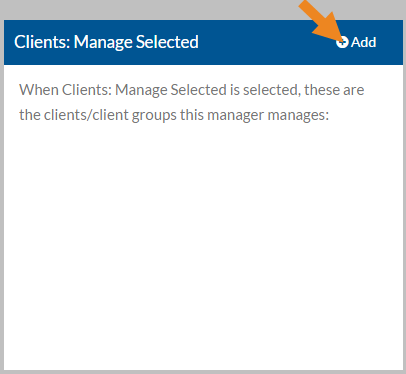
The Clients: Manage Selected window opens.
-
Select either Primary Managers or Department Managers and select the Next button.
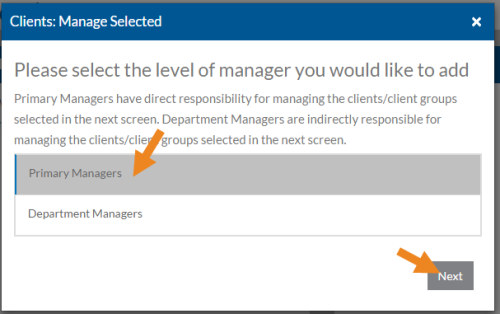
Primary Managers have direct responsibility for managing the Client/Client Groups selected on the next screen. Department Managers are indirectly responsible for managing the Client/Client Groups selected on the next screen.
-
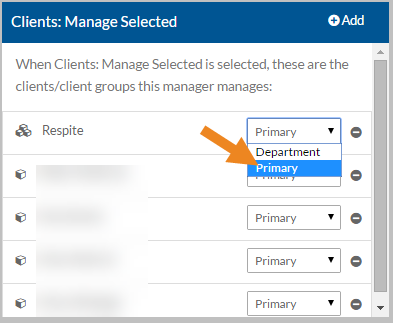
Select the Client/Client Groups that this user manages and then select the Save button.

The Clients/Client Groups appear on the card and you can change the manager type if needed.
-
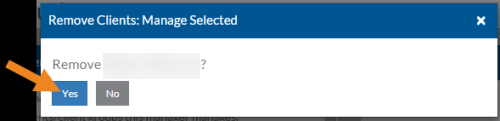
Select the minus sign next to a Client or Client Group to remove it from the Clients: Manage Selected card.
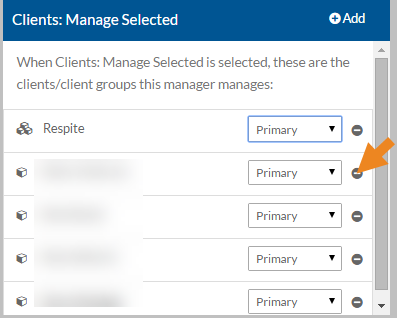
A confirmation message appears.
-
Select the Yes button.
-
The Client or Client Group no longer appears in the Clients: Manage Selected card.
Staff Schedule security roles are available to those agency that have licensed Staff Scheduling.
These steps are for those agencies that are not syncing their security settings from ProviderPro or Employee Care. These settings may be read-only for those agencies that are syncing and are instead maintained either on the DataPlus Sync tabs of the Employee in ProviderPro, the Time Tracking/Staff Scheduling Sync tab of the Employee screen in Employee Care or the Position in Employee Care depending on your agency’s configuration.
For more information see:
-
Maintaining Security from ProviderPro Employee
-
Maintaining Security from Employee Care Employee
-
Maintaining Security from Positions (Step 10)
To set up Staff Scheduling security roles:
-
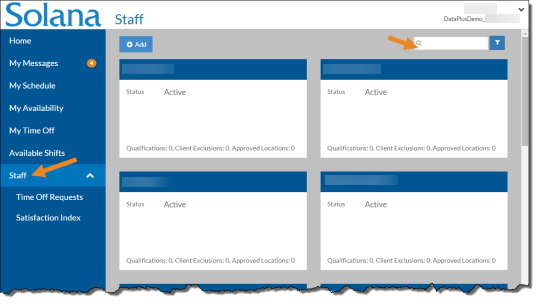
Select Staff from the menu or if you have Client Care, select Employee Care from the menu and then select Employees.
-
Enter the name of the staff you want to assign security roles to in the Search field.

-
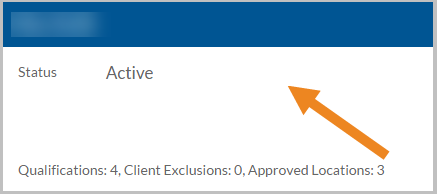
Select the card of the staff member.

The staff's card opens.
-
Select Security from the Main menu. If you have Client Care, select Staff Scheduling/Time Tracking Security instead.


-
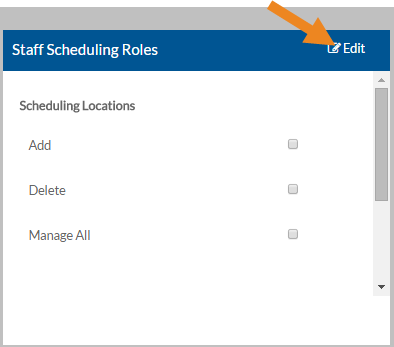
Select Edit on the Staff Scheduling Roles card.
-
Select or clear the appropriate security role(s) as follows:
Role Description Scheduling Locations: Add Add new scheduling locations to Staff Scheduling
Scheduling Locations: Manage All Update information (schedule method, qualifications, etc.) for all scheduling locations.
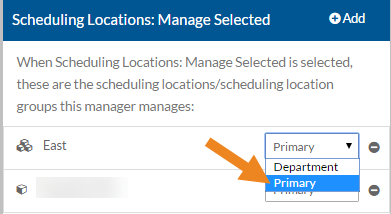
Scheduling Location Type If Scheduling Locations: Manage All is selected, the Manager Type appears. The primary manager has direct responsibility for managing all scheduling locations. The department manager is indirectly responsible for managing all scheduling locations. Scheduling Locations: Manage Selected Update information (schedule method, qualifications, etc.) for specific scheduling locations. You must also assign Scheduling Locations on the Scheduling Locations: Manage Selected card. Go to Step 6.
Scheduling Locations: Delete Delete a scheduling location from Staff Scheduling.
Scheduling Locations: Schedule All Create/ publish the schedule and approve/deny change requests for all scheduling locations.
Scheduling Locations: Manager Type If Scheduling Locations: Schedule All is selected, the Manager Type appears. The primary manager has direct responsibility for scheduling all scheduling locations. The department manager is indirectly responsible for scheduling all scheduling locations. Scheduling Locations: Schedule Selected Create/ publish the schedule and approve/deny change requests for specific locations. You must also assign Scheduling Locations on the Scheduling Locations: Schedule Selected card. Go on to Step 11.
-
If the Scheduling Locations: Manage Selected role is selected, then select Add on the Scheduling Locations: Manage Selected card.
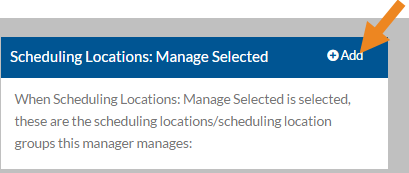
The Scheduling Locations: Manage Selected window opens.
-
Select either Primary Managers or Department Managers and select the Next button.
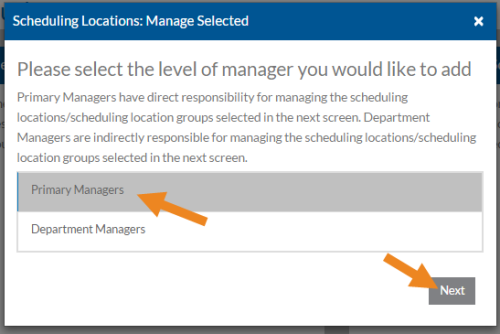
Primary Managers have direct responsibility for managing the Scheduling Locations selected on the next screen. Department Managers are indirectly responsible for managing the scheduling locations/scheduling location groups selected on the next screen.
-
Select the scheduling locations/scheduling location groups this user manages and then select the Save button.
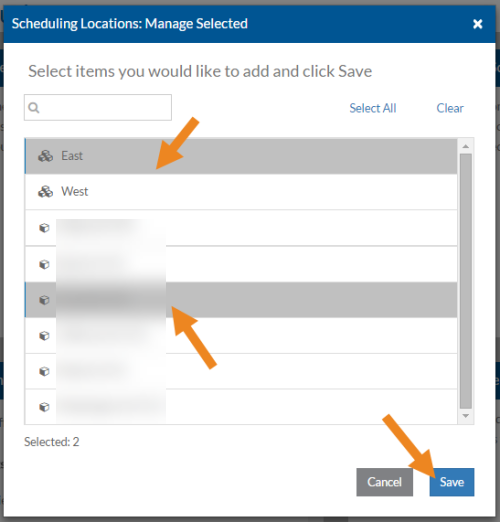
The scheduling locations/scheduling location groups appear on the card and you can change the manager type if needed.
-
Select the minus sign next to a scheduling location or scheduling location group to remove it from Scheduling Locations: Manage Selected card.
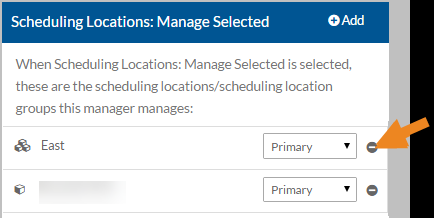
A confirmation message appears.
-
Select Yes.
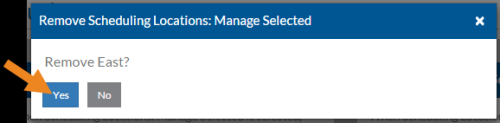
The scheduling location/scheduling location group no longer appears in the Scheduling Locations: Manage Selected card.
-
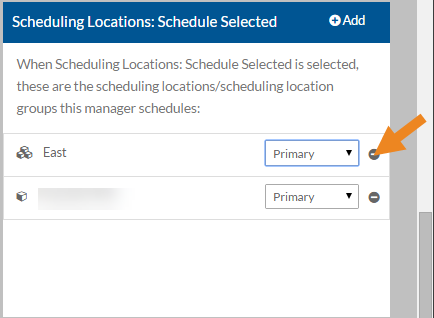
If the Scheduling Locations: Schedule Selected role is select, then select Add on the Scheduling Locations: Schedule Selected card.
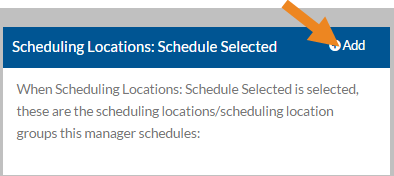
The Scheduling Locations: Schedule Selected card opens.
-
Select either Primary Managers or Debarment Managers and select the Next button.
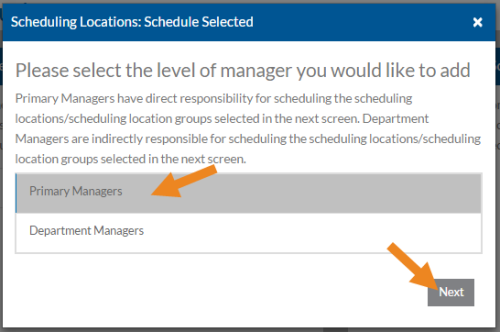
Primary Managers have direct responsibility for managing the scheduling locations/scheduling location groups selected on the next screen. Department Managers are indirectly responsible for managing the scheduling locations/scheduling location groups selected on the next screen.
-
Select the scheduling locations/scheduling location groups this user schedules and then select the Save button.
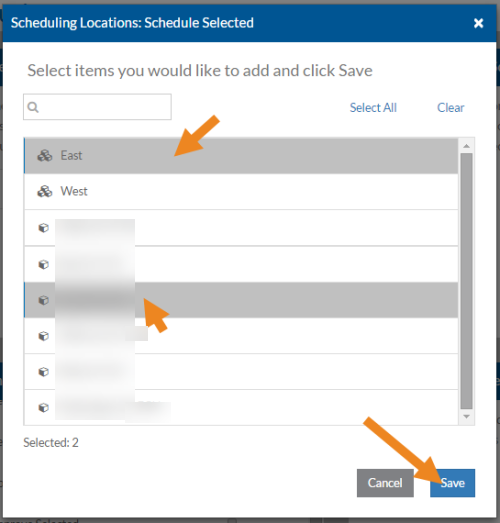
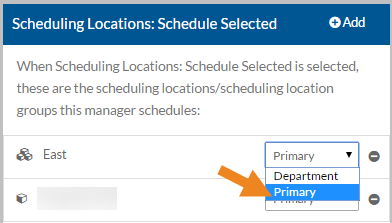
The scheduling locations/scheduling location groups appear on the card and you can change the manager type if needed.
-
Select the minus sign next to a scheduling location or scheduling location group to remove it from the Scheduling Locations: Schedule Selected card.
A confirmation message appears.
-
Select the Yes button.
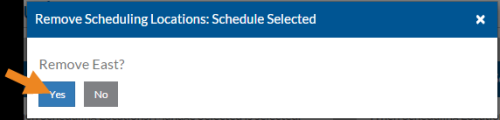
The scheduling location or scheduling location group no longer appears in the Scheduling Locations: Schedule Selected card.
Time Tracking security roles are available to those agencies that have licensed Time Tracking.
These steps are for those agencies that are not syncing their security settings from ProviderPro or Employee Care. These settings may be read-only for those agencies that are syncing and are instead maintained either on the DataPlus Sync tabs of the Employee in ProviderPro, the Time Tracking/Staff Scheduling Sync tab of the Employee window in Employee Care or the Position in Employee Care depending on your agency’s configuration.
For more information see:
-
Maintaining Security from ProviderPro Employee
-
Maintaining Security from Employee Care Employee
-
Maintaining Security from Positions (Step 10)
There are few security settings that can only be maintained on the Security or Time Tracking/Staff Scheduling Security tab: Export Approved (if not syncing from Positions) - Step 6
To set up Time Tracking security:
-
Select Staff from the menu or if you have Client Care, select Employee Care from the menu and then select Employees.
-
Enter the name of the staff you want to assign security roles to in the Search field.
-
Select the card of the staff.
The staff's card opens.
-
Select Security from the Main menu. If you have Client Care, select Staff Scheduling/Time Tracking Security instead.


-
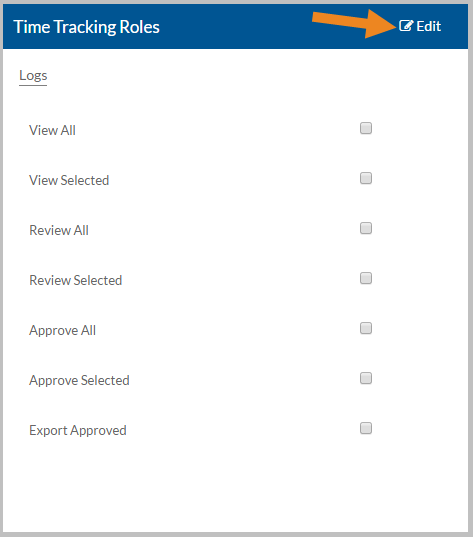
Select Edit on the Time Tracking Roles card.
-
Select or clear the appropriate security role(s) as follows:
Role Description Logs: View All View the Staff Log and Service Location log for all staff (regardless of payroll cost center) and service locations.
View All Manager Type If Logs: View All is selected, the Manager Type appears. The primary manager has direct responsibility for viewing all logs. The department manager is indirectly responsible for viewing all logs and will not get notifications. Logs: View Selected View the Staff Log and/or Service Location Log for specific staff/payroll cost centers and/or service locations. You must also assign specific staff on the Staff Logs: View Selected card (Step 6), payroll cost centers on the Cost Center Logs: View Selected (Step 11) card and/or service locations on the Service Location Logs: View Selected card (Step 16).
Note: The logs for selected payroll cost centers and service locations will appear under the Non-Managed Staff area of the Staff Log. The logs for selected staff will appear under the Managed Staff area of the Staff Log regardless of payroll cost center or service location.
Logs: Review All Review the Staff Log and Service Location Log for all staff (regardless of payroll cost center) and service locations.
Review All Manager Type If Logs: Review All is selected, the Manager Type appears. The Primary Manager has direct responsibility for reviewing all logs. The Department Manager is indirectly responsible for reviewing all logs and will not get notifications. Logs: Review Selected Review the Staff Log and/or Service Location Log for specific staff/payroll cost centers and/or service locations. You must also assign staff on the Staff Logs: Review Selected card (Step 21), payroll cost centers on the Cost Center Logs: Review Selected card (Step 26) and/or service locations on the Service Location Logs: Review Selected card (Step 31).
Note: The logs for selected payroll cost centers and service locations will appear under the Non-Managed Staff area of the Staff Log. The logs for selected staff will appear under the Managed Staff area of the Staff Log regardless of payroll cost center or service location.
Logs: Approve All Approve the Staff Log and Service Location Log for all staff (regardless of payroll cost center) and service locations.
Approve All Manager Type If Logs: Approve All is selected, the manager type appears. The primary manager has direct responsibility for approving all logs. The department manager is indirectly responsible for approving all logs and will not get notifications. Logs: Approve Selected Approve the Staff Log and/or Service Location log for specific staff/payroll cost centers and/or service locations. You must also assign staff on the Staff Logs: Approve Selected card (Step 36), payroll cost centers on the Cost Center Logs: Approve Selected card (Step 41) or service locations on the Service Location Logs: Approve Selected card (Step 46).
Note: The logs for selected payroll cost centers and service locations will appear under the Non-Managed Staff area of the Staff Log. The logs for selected staff will appear under the Managed Staff area of the Staff Log regardless of payroll cost center or service location.
Export Approved Export the approved log transactions. -
If the Staff Logs: View Selected role is selected and this manager should view the logs of specific staff, then select Add on the Staff Logs: View Selected card.
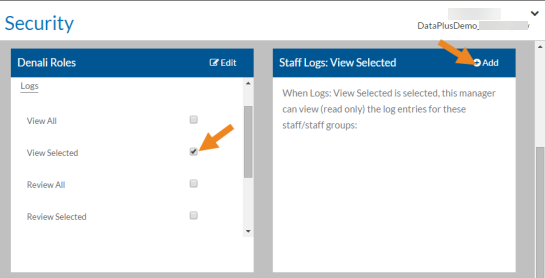
The Staff Logs: View Selected window opens.
-
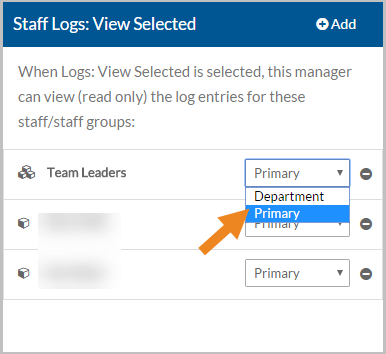
Select either Primary Managers or Department Managers and select the Next button.
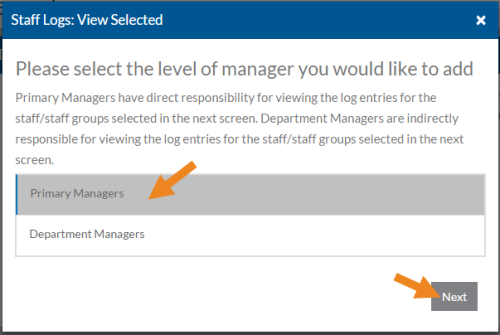
Primary Managers have direct responsibility for viewing the logs of the staff/staff groups selected on the next screen. Department Managers are indirectly responsible for viewing the logs of the staff/staff groups selected on the next screen.
-
Select the staff/staff groups this user should view the logs of and then select the Save button.
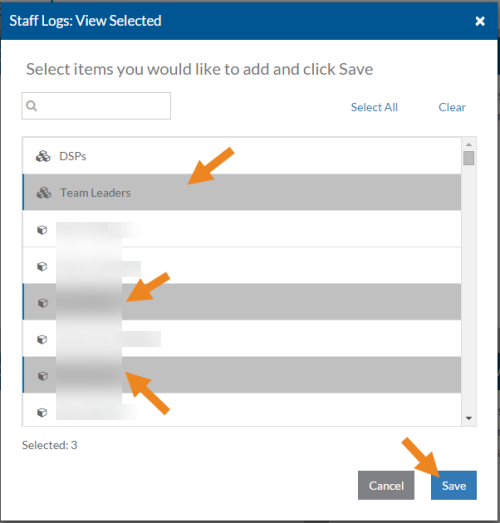
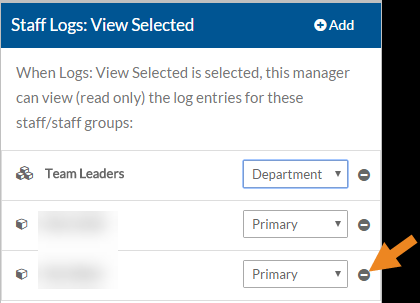
The staff/staff groups now appear on the card and you can change the Manager Type if needed.
-
Select the minus sign next to the staff or staff group to remove them from Staff Logs: View Selected.
A confirmation message appears.
-
Select the Yes button.
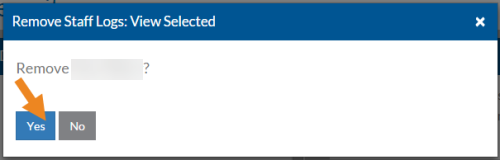
The staff or staff group no longer appears in the Staff Logs: View Selected card.
-
If the Staff Logs: View Selected role is selected and this manager should view selected payroll cost center logs, select Add on the Cost Center Logs: View Selected card.

The Cost Center Logs: View Selected window opens.
-
Select either Primary Managers or Department Managers and select the Next button.

Primary Managers have direct responsibility for viewing the logs of the payroll cost centers/payroll cost center groups selected in the next screen. Department Managers are indirectly responsible for viewing the logs of the payroll cost centers/payroll cost center groups selected in the next screen.
-
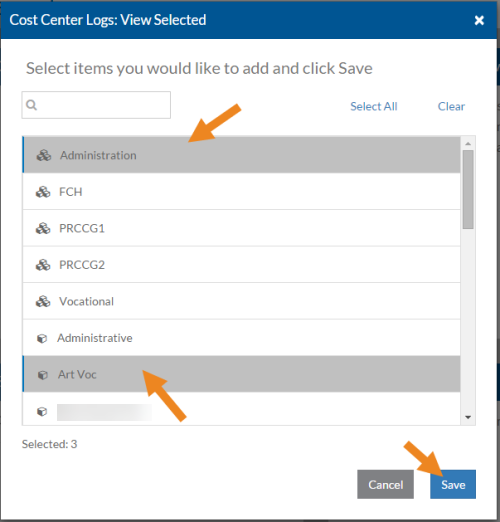
Select the payroll cost centers/payroll cost center groups this user should view the logs of and then select the Save button.
The payroll cost centers/payroll cost center groups now appear on the card and you can change the manager type if needed.

-
Select the minus sign next to the payroll cost center/payroll cost center group to remove it from the Cost Center Logs: View Selected card.

A confirmation message appears.
-
Select the Yes button.

The payroll cost center or payroll cost center group no longer appears in the Cost Center Logs: View Selected card.
-
If the Staff Logs: View Selected role is selected and this manager should view specific service location logs, select Add on the Service Location Logs: View Selected card.

The Service Location Logs: View Selected window opens.
-
Select either Primary Managers or Department Managers and select the Next button.

Primary Managers have direct responsibility for viewing the logs of the service locations/manager service location groups selected in the next screen. Department Managers are indirectly responsible for viewing the logs of the service locations/manager service location groups selected in the next screen.
-
Select the service locations/manager service location groups this user should view the logs of and then select the Save button.

The service location/manager service location groups now appear on the card and you can change the manager type if needed.

-
Select the minus sign next to the service location or service location group to remove it from Service Location Logs: View Selected.

A confirmation message appears.
-
Select the Yes button.

The service location or service location group no longer appears in the Service Location Logs: View Selected card.
-
If the Staff Logs: Review Selected role is selected and this manager should review the logs of specific staff, then select Add on the Staff Logs: Review Selected card.

The Staff Logs: Review Selected window opens.
-
Select either Primary Managers or Department Managers and select the Next button.

Primary Managers have direct responsibility for reviewing the logs of the staff/staff groups selected in the next screen. Department Managers are indirectly responsible for reviewing the logs of the staff/staff groups selected in the next screen.
-
Select the staff/staff groups this user should review the logs of and then select the Save button.

The staff/staff groups now appear on the card and you can change the manager type if needed.

-
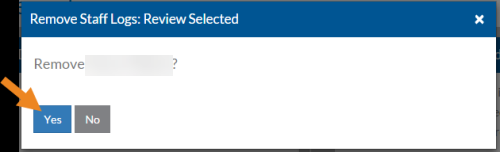
Select the minus sign next to the staff or staff group to remove them from Staff Logs: Review Selected card.
A confirmation message appears.
-
Select the Yes button.
The staff or staff group no longer appears in the Staff Logs: Review Selected card.
-
If the Staff Logs: Review Selected role is selected and this manager should review the logs of specific payroll cost centers, select Add on the Cost Center Logs: Review Selected card.

The Cost Center Logs: Review Selected window opens.
-
Select either Primary Managers or Department Managers and select the Next button.

Primary Managers have direct responsibility for reviewing the logs of the payroll cost centers/payroll cost center groups selected in the next screen. Department Managers are indirectly responsible for reviewing the logs of the payroll cost centers/payroll cost center groups selected in the next screen.
-
Select the payroll cost centers/payroll cost center groups this user should review the logs of and then selet the Save button.

The payroll cost centers/payroll cost center groups now appear on the card and you can change the manager type if needed.

-
Select the minus sign next to the payroll cost center or payroll cost center group to remove it from Cost Center Logs: Review Selected card.

A confirmation message appears.
-
Select the Yes button.

The payroll cost center or payroll cost center group no longer appears in the Cost Center Logs: Review Selected card.
-
If the Staff Logs: Review Selected role is selected and this manager should review the logs of specific service locations, then select Add on the Service Location Logs: Review Selected card.

The Service Location Logs: Review Selected window opens.
-
Choose either Primary Managers or Department Managers and select the Next button.

Primary Managers have direct responsibility for reviewing the logs of the service locations/manager service location groups selected in the next screen. Department Managers are indirectly responsible for reviewing the logs of the service locations/manager service location groups selected in the next screen.
-
Select the service locations/manager service location groups this user should review the logs of and then select the Save button.

The service location/manager service location groups now appear on the card and you can change the manager type if needed.

-
Select the minus sign next to the service location or manager service location group to remove it from the Service Location Logs: Review Selected card.

A confirmation message appears.
-
Next, select the Yes button.
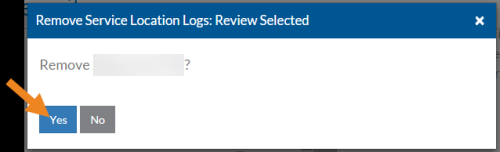
The service location or manager service location group no longer appears in the Service Location Logs: Review Selected card.
-
If the Staff Logs: Approve Selected role is selected and this manager should approve the logs of specific staff, then select Add on the Staff Logs: Approve Selected card.

The Staff Logs: Approve Selected window opens.
-
Choose either Primary Managers or Department Managers and select the Next button.

Primary Managers have direct responsibility for approving the logs of the staff/staff groups selected in the next screen. Department Managers are indirectly responsible for approving the logs of the staff/staff groups selected in the next screen.
-
Select the staff/staff groups this user should view the logs of and then select the Save button.

The staff/staff groups now appear on the card and you can change the Manager Type if needed.

-
Select the minus sign next to the staff or staff group to remove them from the Staff Logs: Approve Selected card.

A confirmation message appears.
-
Select the Yes button.

The staff or staff group no longer appears in the Staff Log: Approve Selected card.
-
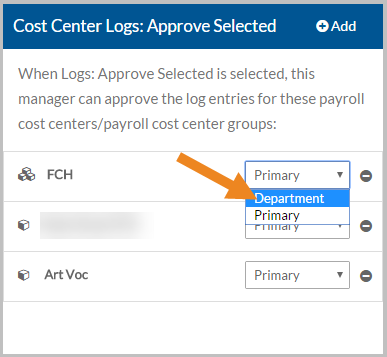
If the Staff Logs: Approve Selected role is selected and this manager should approve the logs of specific payroll cost centers, then select Add on the Cost Center Logs: Approve Selected card.

The Cost Center Logs: Approve Selected window opens.
-
Select either Primary Managers or Department Managers and select the Next button.

Primary Managers have direct responsibility for approving the logs of the payroll cost centers/payroll cost center groups selected in the next window. Department Managers are indirectly responsible for approving the logs of the payroll cost centers/payroll cost center groups selected in the next window.
-
Select the payroll cost centers/payroll cost center this user should view the logs of and then click Save.

The payroll cost centers/payroll cost center groups now appear on the card and you can change the manager type if needed.
-
Select the minus sign next to the payroll cost center or payroll cost center group to remove it from theCost Center Logs: Approve Selected card.

A confirmation message appears.
-
Select the Yes button.
The payroll cost center or payroll cost center no longer appears in the Cost Center Logs: Approve Selected card.
-
If the Staff Logs: Approve Selected role is selected and this manager should approve the logs of specific service locations, then select Add on the Service Location Logs: Approve Selected card.

The Service Location Logs: Approve Selected window opens.
-
Choose either Primary Managers or Department Managers and select the Next button.

Primary Managers have direct responsibility for approving the logs of the service location/manager service location groups selected in the next screen. Department Managers are indirectly responsible for approving the logs of the service location/manager service location groups selected in the next screen.
-
Select the service location/manager service location groups this user should view the logs of and then click Save.

The service location/manager service location groups now appear on the card and you can change the manager type if needed.

-
Select the minus sign next to the service location or manager service location group to remove it from Service Location Logs: Approve Selected card.

A confirmation message appears.
-
Select the Yes button.

The service location or manager service location group no longer appears in the Service Location Logs: Approve Selected card.