Sandata Employee

Some state programs provide a file to Sandata to bring in employee information. This may come from a state-managed employee registry. This means you cannot add your own employee information but have to search for an employee within the feed.
Certain employee information cannot be edited. The bulk import feature cannot be used in the Employee module.
Complete the following steps to add an employee to a feed:
-
Go to the Employee module and select the CREATE EMPLOYEE button.


-
Complete the required fields and select the SEARCH button to find the employee you want to add. Different required fields may display depending on the state program.
If the employee is not found, check the information submitted. If there are issues finding the employee after checking the information, reach out to your state program for assistance in validating the information.

-
Once the employee has been found, complete the email field and be sure that the Mobile User option is selected. This is an easy way to quickly enable Sandata Mobile Connect access for your employee.
-
Next, select the Create Employee button to finish the process.

You can edit an employee’s profile to add or update personal information. Make sure that each employee has an address, phone number, email address, and at least one contact on file. To edit an existing employee:
-
Open the Employees feature and select the profile to edit.
-
Use the Edit
 icon or ADD options to open the section you need to update. It’s best to open each card to review employee details.
-
Update the field or fields that need to be changed.
-
Select the SAVE CHANGES button to save the changes.

Use the following steps to add a new employee to the system. If you want to use the import feature to bulk import employees, see the Importing Employeestopic.
-
Go to the Employees feature.
-
Select the CREATE EMPLOYEE button to open the New Employee window.

-
Enter the employee’s data. Fields with a red asterisk (*) are required. Select CREATE EMPLOYEE when done.

-
Next, add or edit employee information: There are two tabs on the page, the Personal tab and the Schedules tab. You are automatically brought to the Personal tab to complete or edit any employee information. Use the edit
to add or edit identifier and personal information.
-
Select the ADD CONTACT button and fill in all required fields to add a contact. When complete, select the SAVE button. To Save and add another contact, select the SAVE AND ADD NEW button. Make sure you add an email address for those employees that need access to the Mobile App, Sandata Mobile Connect.

There may be times when you need to search and find an employee’s record to view or edit their information. To do so:
-
Go to the Employees page.

A list of employees appears on the Employees page.
-
Choose the employee from the list or use the quick search field to search for the employee.

-
Enter a name in the quick search field. Next, select the employee.
To search for employees using the filters, enter search criteria by selecting the FILTERS button.

-
Use filters such as Status and Position to find all employees in that set and select the APPLY FILTERS button.

More than one employee can be added at a time by importing an employee list. Complete the following steps to add multiple employees with a bulk upload.
-
Go to the Employees page and find and select the IMPORT button.

-
Select the DOWNLOAD TEMPLATE option to fill in items on the Excel spreadsheet.

The following is an example of what the spreadsheet should look like after downloading the template.

-
After completing the spreadsheet, save it on a computer. Next, upload the file.
The fields below are required to be completed in the spreadsheet. Complete as many columns as you prefer.
- FIRST NAME
- LAST NAME
- EMPLOYEE AGENCY ID
- EMPLOYEE POSITION ID = CGV or LPN or OFC or RN (Note: CGV = caregiver, OFC = agency staff)
- GENDER
- IS SUPERVISOR
- Select checkbox items that may apply under Import Settings.
-
Select the IMPORT button (available after the upload is successfully completed).

An employee’s Sandata Mobile Connect password can be reset in the employee profile window.
-
Go to the Employees page and select the employee's profile whose password you need to reset.
-
Use the three dots ... menu to edit the information.

-
Select the RESET MOBILE USER PASSWORD button.

A temporary password is sent to the email address listed in the employee’s profile.
Caregivers who want access to Sandata Mobile Connect need to enable mobile access in the system.
-
Go to the Employees page and find and select the employee.

-
Scroll down to the Addresses section. Select the three dots menu ... to open the address and phone number information.

-
Select the Mobile user checkbox (required to add an email address for the employee) and select the SAVE button.

A specific employee’s schedule can easily be found within the Employee feature. Complete the following steps to view an employee's schedule.
-
Go to the Employees page to find the list of employees. Choose an employee from the list or use the quick search field to search for an employee.

-
Next, enter a name in the quick search field.
-
Select the employee.

-
Choose the Schedules tab and customize the date range to apply the correct time.

-
Scheduled visits, along with the status of the schedules, display for that employee.

Complete the following steps to add a task note to an employee’s profile.
-
Go to the Employees page.

-
Use the quick search field to search for an employee, then select the employee’s name to open their profile.

-
Select the NOTES option.

-
Select the +ADD button to add a new task note.

-
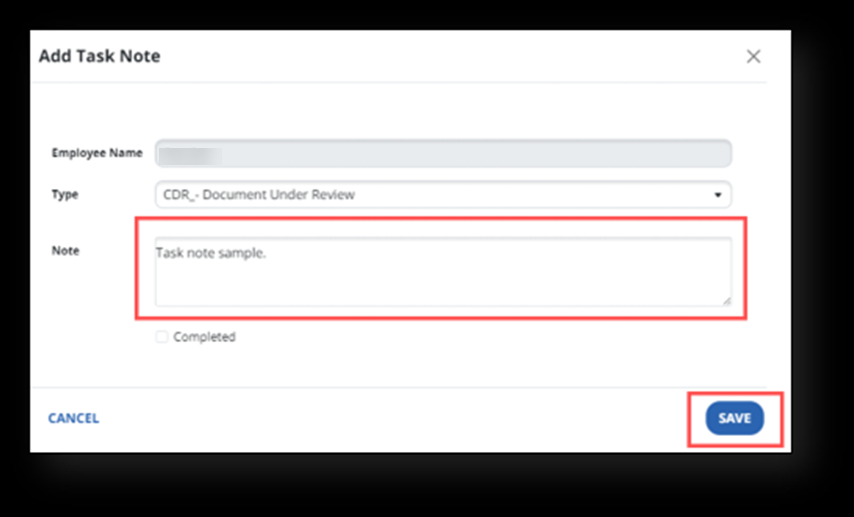
Select the type of note being added from the Typedrop-down menu.

-
Add a task note in the Note field and select the SAVE button.
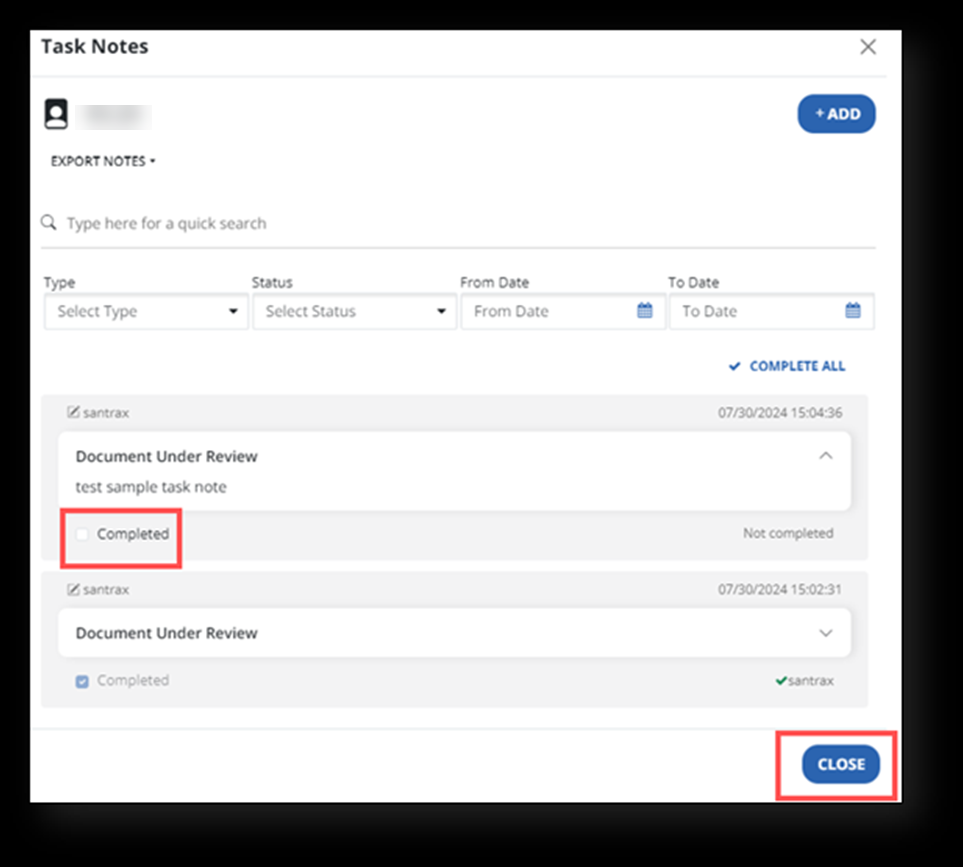
After the task is finished, an employee can mark the task note as complete by selecting theCompletedcheckbox and selecting theClosebutton.