Change a Payer
Follow the process to change a Payer when a Client’s new Payer needs to be updated. The Client’s Medicaid ID is needed prior to starting the process. To change a Payer:
-
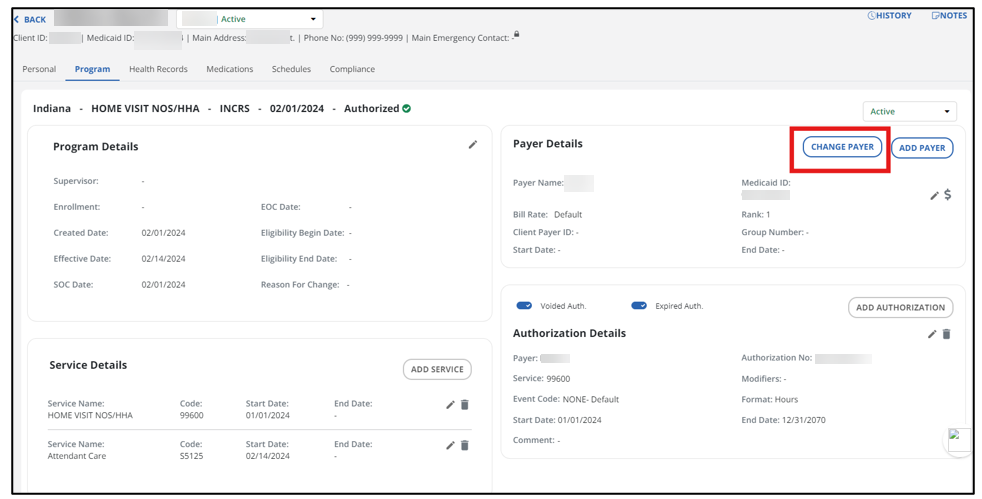
Open the Client’s profile and select the Program tab.
-
In the Payer Details section, select the CHANGE PAYER button.
-
Next you are asked if an invoice is already created for this Client. If there are invoices/batches, they should be canceled. At this time, you can build schedules for one Client, then select the CONTINUE button.

-
Add the Effective Date when the new program went into effect.

-
Select the Update Service Begin Dates checkbox. Select the CONTINUE button.

-
In the next window, select options from the Program and Bill Rate dropdown menus. Select a new Payer from the Payer dropdown menu.
Enter the Customer Number and Medicaid ID on the Change Payer window because it is not an editable field in the profile.
Once complete, select the CONTINUE button.
-
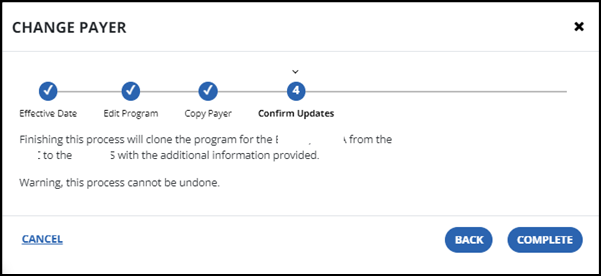
The Confirm Updates step confirms you want schedules and diagnosis to copy to the new chart. Next, select the CONTINUE button.

-
The system outlines the changes and confirms you want to complete this process; it cannot be undone.
If this Client has a permanent template, it will not copy over. Only the individual schedules copy over.
-
There are now two charts in the Client’s chart, an inactive and active option. Select the inactive chart, open the authorization and end date as of 6/30/2024.

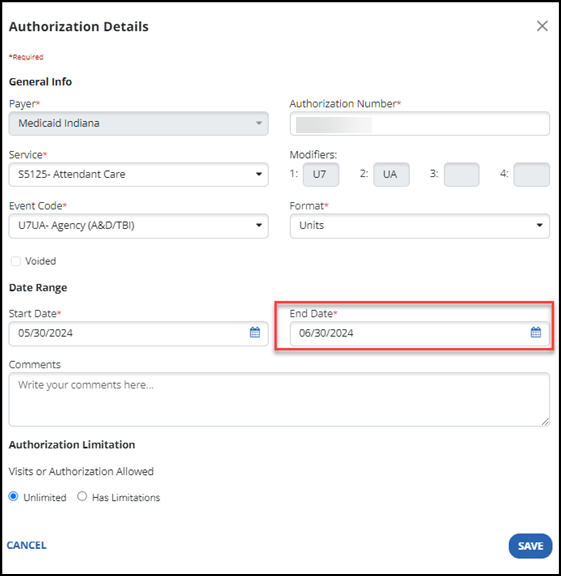
Look for the contact and authorization to come over.