Sandata Agency Management 09-System Payors Feature
The System Payors feature maintains all data related to Payers entered in the system regardless of whether they are currently active.
To access the System Payors feature, go to Payors under Main Menu > Billing > Payors.


The search filters allow users to narrow the results list to meet specific criteria. A specific field used as well as a combination of fields.
Inactive Payers are hidden by default. To search through all Payers, deselect the Hide In-active Payers checkbox.

|
Field |
Description |
|---|---|
|
Name |
Use this field to filter results by Payer name. |
|
Hide In-active Payors |
Select this checkbox to remove in-active Payers from being displayed in the results. |
The results list displays all Payers matching the search terms entered in the search filter.

|
Field |
Description |
|---|---|
|
Name |
Displays the list of Payers matching the search filters. |
To add a new payer:
-
Go to the Payors window under Main Menu > Billing > Payors.
-
Select Add.

-
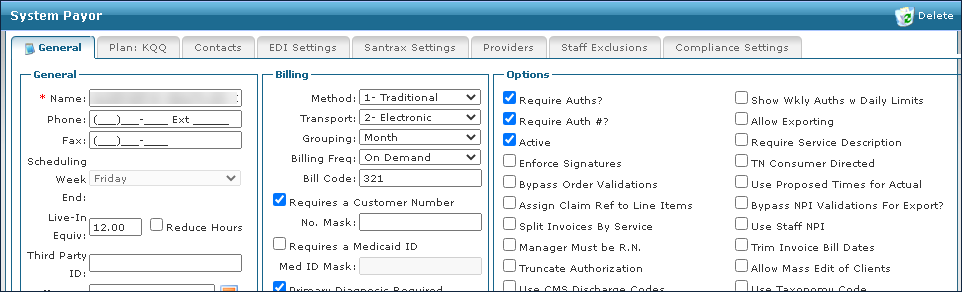
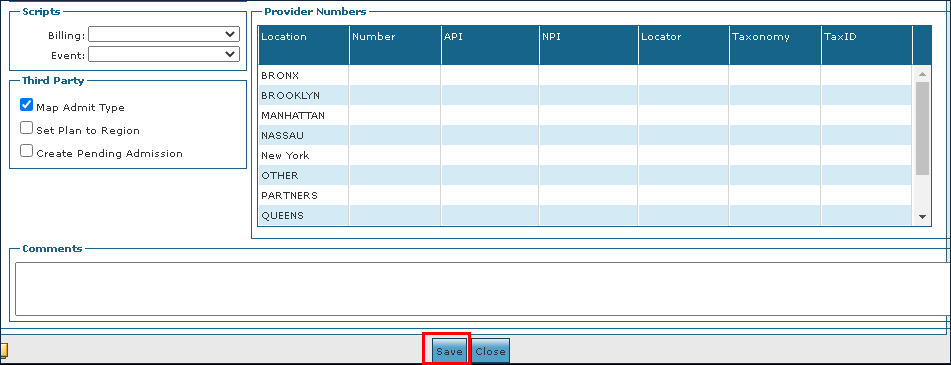
Enter the required information in the System Payor window.

-
Select the Save button.

To locate a previously added Payer:
-
Go to the Payors window under Main Menu > Billing > Payors.
-
Next, use the search filters to locate the Payer by name.

-
Select Refresh.
-
Double click on the Payer to open the System Payer window.
To make changes to an existing Payer:
-
Go to the Payors screen under Main Menu > Billing > Payors.
-
Use the search filters to locate the Payer by name.
-
Select Refresh.

-
Double click on the Payer to open the System Payer window.

-
Make any necessary changes or updates.
-
Select the Save button.
A Payer can only be removed if it was never assigned to a Client admission. To remove an existing Payer:
-
Go to the Payors window under Main Menu > Billing > Payors.
-
Use the search filters to locate the Payer by name.
-
Select Refresh.

-
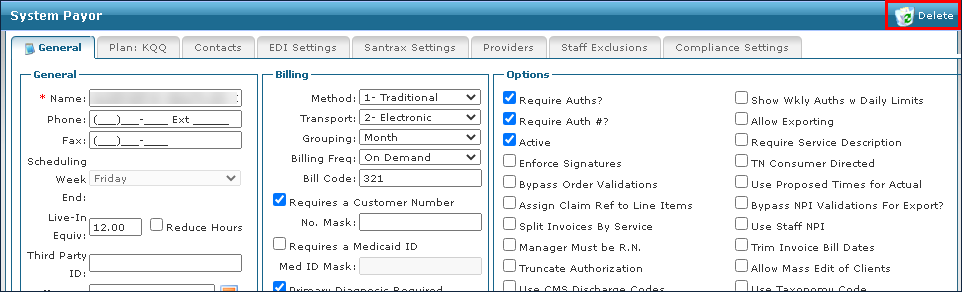
Double click on the Payer to open the System Payer window.
-
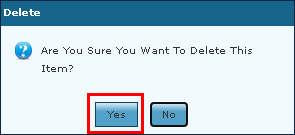
Select Delete.
-
Select the Yes button.
The Retroactive Rate feature allows users with appropriate rate adjustment permissions to edit a billing rate after the hours are already invoiced. The new billing rates update invoices on the Invoice Detail window, based on the new rate’s effective date. If hours are already billed, the system generates a rate adjustment on the invoice.
Setting Up Retroactive Rate Feature
To enable the retroactive feature under the System Settings window
-
Go to the Billing section of the System Settings page under Main Menu > Admin > System Settings > Billing.
-
Select the Enable Rate Adjustment checkbox.
-
Select Save.

Enabling Staff Security Permissions
There are two different ways to assign staff members’ permissions to make retroactive rate adjustments. To enable staff security permissions:
-
Assign the Rate Adjustment privilege at the group level under Main Menu > Admin > System Setup > Security Groups. The privilege can be assigned to a new or an existing group. Each staff member assigned the group membership has the privilege.
-
Assign the Rate Adjustment privilege at the individual level on a staff member’s profile under Main Menu > Staff > Search for and open profile > Security.
Retroactive rates are applied using the Payer rate table for a specific service and event. Use the following process to apply a rate adjustment.
-
Go to the System Payor window under Main Menu > Billing > Payors > Search for and open a system payer.
-
Select the appropriate Plan tab.
-
Select the Billing Rates tab.
-
Select a rate line.
It is best practice to only clone rates with an Active status.
-
Right click to display the context menu.
-
Then select Clone.

-
Enter the (retroactive) effective date for the new rate in the Select Effective Date field.

-
Select the Submit button.
The cloned rate displays at the bottom of the list of billing rates. To see the effective date, scroll right at the bottom of the Billing Rates tab.

-
Edit the existing billing rates in the Week Rate, Weekend Rate, or Overtime Billing columns of the cloned rate line.
If any rates are not defined, enter or leave a rate of $0.00.

-
Select Save.
-
Next, select the OK button.

-
Select the OK button.
A progress indicator displays as the system edits invoices retroactively. If the indicator displays and closes immediately, no edits were made.


-
Select OK.
A pop-up displays, indicating the number of invoices changed and total dollar amount of the adjustments made. It also displays any errors that occur, prompting the user for final confirmation. When confirmed, the system finalizes the changes.


-
Select the OK button.

Invoices that changed retroactively show the adjustments on the Invoice Detail window, marked as Retroactive Adjustments. The balance of the invoice changes according to the total amount of all items adjusted.

The items attached to the invoice are also adjusted. Select the Attached Items tab to display a list of items in the invoice. The new amounts for the items adjusted display in the Billed and Pmt/Adj columns. Select the Plus icon (+) to display the adjustment. Retroactive rate adjustments are indicated using the type RRA.

Items not Affected by Retroactive Rate Adjustments
Retroactive rate functionality updates billing rates only on the Payer level. Because the following fields are not affected by Payer rates, they are not updated:
-
Rates applied at the client level
-
Copays
-
Transfers
-
Surplus
-
Special event codes
-
Schedules