Sandata Agency Management 01-Billing Review Window
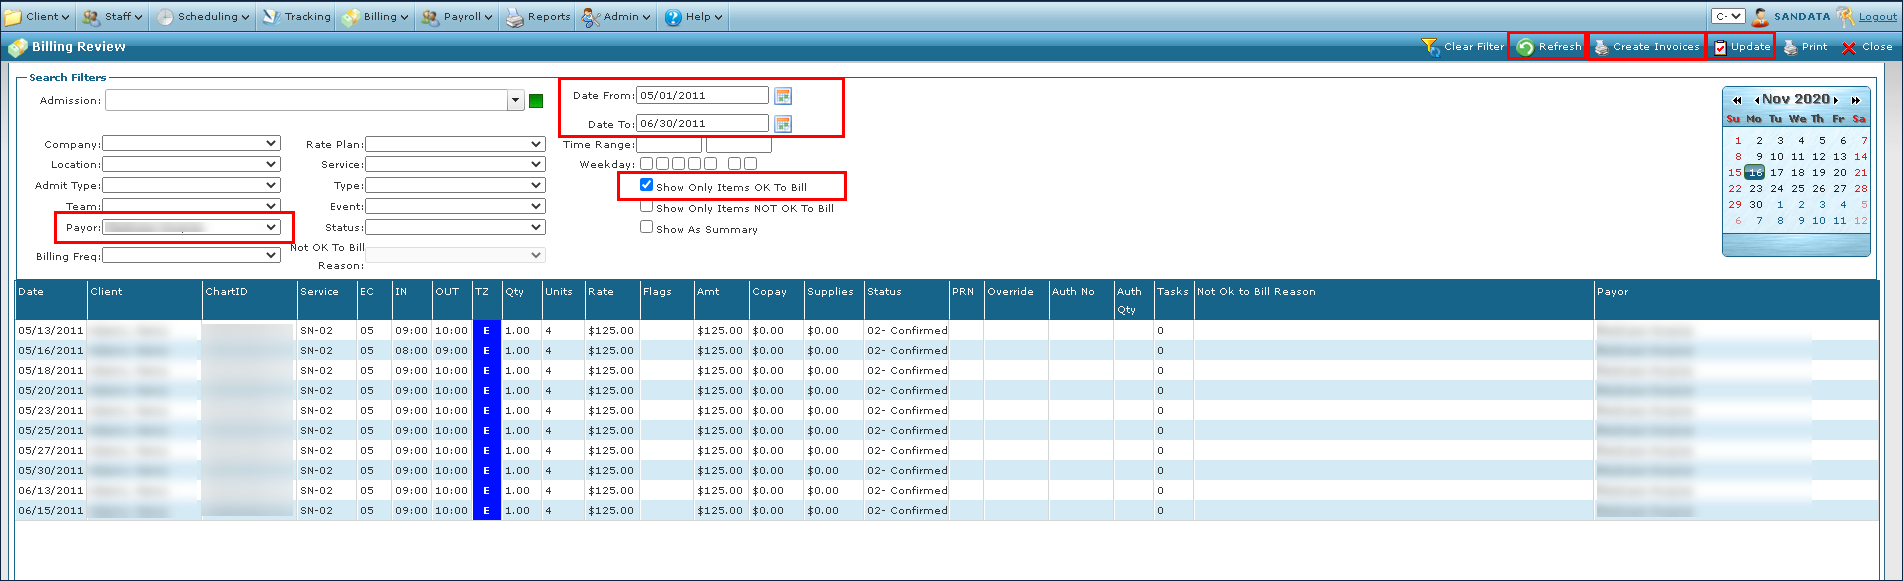
The Billing Review window allows users to review visits that are eligible for invoicing as well as visits that have conflicts that need to be resolved.
To access the Billing Review window, go to Main Menu > Billing.


The Billing Review window displays visits that match the criteria selected. Users can prepare items for invoicing, perform exception handling, or make other edits and corrections as needed.
To search Billing Review:
-
Go to the Billing Review window under Main Menu > Billing.
-
Select the appropriate search criteria.
-
Select Refresh.
The Billing Review window allows a 30 day date range to be reviewed without selecting a Payer. If the date range exceeds 30 days, a Payer must be selected. By default, all visits display for the selected date range. Select the Show Only Items OK to Bill checkbox to display the billable events for the selected date range.

The Search Filters allow users to narrow the Results List to meet specific criteria. It is possible to use a particular field as well as a combination of fields.

|
Field |
Description |
|---|---|
|
Admission |
Use this field to filter Clients by name. |
|
Company |
Use this field to filter visits for the associated company. |
|
Location |
Use this field to filter visits for the associated location. |
|
Admit Type |
Use this field to filter visits by the admission type. |
|
Team |
Use this field to find visits by the associated team. |
|
Payor |
Use this field to filter for visits by the associated Payer. |
|
Billing Frequency |
Use this field to filter visits by their billing frequency. |
|
Rate Plan |
Use this field to filter visits by available rate plans. |
|
Service |
Use this field to filter visits by the associated service. |
|
Type |
Use this field to filter visits by their billing type. |
|
Event |
Use this field to find visits by the associated event code. |
|
Status |
Use this field to filter visits by the selected status. |
|
Not OK To Bill Reason |
Use this field to filter visits by their exception reason. |
|
Date From |
Use the selected to and from date to filter results by visits that occurred within the selected date range. |
|
Date To |
|
|
Time Range |
Use the selected time range to filter results by all visits that occurred within the selected time frame. |
|
Weekday |
Select these checkboxes to filter visits by a specific day of the week. Each box represents a different day of the week (Monday to Sunday). |
|
Show Only Items OK to Bill |
Select this checkbox to filter for visits marked OK To Bill. |
|
Show Only Items NOT OK to Bill |
Select this checkbox to filter for visits marked NOT OK to Bill. These visits need exception handling before they are OK to Bill. |
|
Show as Summary |
Select this checkbox to view all results in the summarized format. |
The Results List displays all visits matching the selected search criteria.

|
Field |
Description |
|---|---|
|
Date |
Displays the date of service. |
|
Client |
Displays the Client’s name. |
|
ChartID |
Displays the Client’s assigned ChartID number. |
|
Service |
Displays the code associated with the service received. |
|
EC |
Displays the event code. |
|
IN |
Displays the call in time. |
|
OUT |
Displays the call out time. |
|
TZ |
Displays the agency’s time zone. |
|
Quantity |
Displays the total hours between the visit’s call in and call out. |
|
Units |
Displays the billing quantity for the visit, converted to units. Units are defined based on how the service is billed. |
|
Rate |
Displays the service rate for the visit. |
|
Flags |
Displays any flags associated with the visit. |
|
Amount |
Displays the total billable amount of the visit. |
|
Copay |
Displays the copay amount. |
|
Supplies |
Displays the dollar amount for any supplies used. |
|
Status |
Displays the status of the visit. |
|
PRN |
Displays the PRN rate for the visit. |
|
Override |
Displays a Y if there are overrides associated with the visit. |
|
Authorization Number |
Displays the ID number associated with the selected visit’s authorization. |
|
Authorization Quantity |
Display’s the number of authorized units for a visit. |
|
Tasks |
Displays the number of tasks entered during the visit. |
|
OT / AB Hours |
Displays OT / AB Hours entered during exception handling. |
|
OT / AB Code |
Displays OT / AB Codes entered during exception handling. |
|
Not OK to Bill Reason |
Displays exceptions that must be resolved before the visit can be billed. |
|
Payor |
Displays the Client’s Payor. |
A summary of all events displayed is shown. If there are events selected, the total for those events will be displayed on the right side of the totals bar.

|
Field |
Description |
|---|---|
|
Items |
Displays the number of visits matching the search criteria. |
|
Visits |
Displays the total number visits. |
|
Hours |
Displays the total number of billable hours. |
|
Units |
Displays the total number of billable units. |
|
Pending / Hold |
Displays the total number of visits marked Pending/Hold and the billable amounts. |
|
Confirmed |
Displays the total number of visits marked Confirmed and the billable amounts. |
|
Billed |
Displays the total number of visits marked Billed and the billable amounts. |
|
Total Hours |
Displays the total number of hours for visits and the billable amounts. |
|
Visits without Equivalency |
Displays the number of visits without equivalency. |
|
Copay |
Displays the copay total for all visits. |
|
Supplies |
Displays the supplies total for all visits. |
Double click or right-click and choose Open on any item to view the schedule.
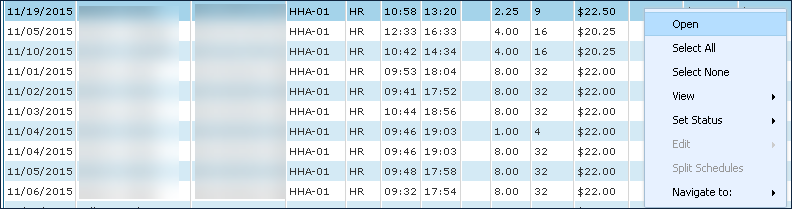
Occasionally a visit contains exceptions that must be resolved before an invoice can be created. The Navigate To option allows users to immediately open a Client profile, correct any issues and then return to the previous screen.
-
Select the visit from the results list.
-
Right click to open the dropdown menu and select Navigate to: > Client.

-
This opens the General section of the Client’s Admission.
-
Resolve any necessary conflicts.
-
Select Save.
-
Select Close.
The user is then returned to the Billing Review window.
Select All or Select None highlights all items in the Results List or deselects any items previously selected item.
It is also possible to select multiple items by holding the Ctrl button while selecting items. To select multiple items in a row, hold the Shift button and select the first and last item.

Two formats are provided for displaying events: Details and Summary. The Summary View can also be activated by checking the Show As Summary option in the Filters section.
Right-click and choose View.
The default view is Details.
Details View: The Details view offers an in-depth overview of each visit matching the search criteria.

Summary View: The Summary view condenses clients with multiple events into a single line. Summary view contains less information but offers a more digestible view of the search results.

On the Billing Review window, Set Status can be used to change the status of events without having to open the Schedule Detail window. This is helpful for tasks such as bulk editing or getting an item ready to bill after resolving an exception.
The list of available statuses is based on agency / Payer configuration.
-
Select an event or several events in the Results List.
-
Right-click and choose Set Status.
-
Select a status from the dropdown menu.
The new status will be applied to all selected visits.

The Create Invoices window allows users to generate invoices to be sent to a Payer or client for payment. The Create Invoices button is in the top right corner of the Billing Review window.

|
Field |
Description |
|---|---|
|
Invoice Date |
Use this dropdown to select a date for the invoice. |
|
Due On |
Use this field to indicate the invoice’s payment due date. |
|
Comments |
Use this field to enter any notes about the invoice. |
|
Print All Invoices Created |
Select this checkbox to print copies of all invoices being created. Invoices are generated in a printable PDF format after the creation process is completed. |
|
Print A Summary Report |
Select this checkbox to print a summary report of all invoices being created. This report can be used as a sales register. |
To create an invoice:
-
Go to the Billing Review window under Main Menu > Billing.
-
Next, select all applicable filters.
-
Select the Show Only Items OK to Bill checkbox.
-
Select Refresh.
-
Select Update.
-
Then select the Create Invoices button.
-
Edit the Create Invoices fields as needed.
Select the Validate Transfers button when it displays to verify the correct service rates for the Payer. If there are no issues, the following message displays.

If there are problems with the service rates, select the Use Master Rates checkbox to add the rate information for that service from either the System Payor window’s Plan tab or the Master Rates window and select Create Invoices.

-
Next, select the Create Invoices button.

-
Select OK to apply any pre-payments, remaining balances, or existing credits. or select Cancel to begin creating the invoice.

-
Wait for the invoice to complete processing.
Be patient, the system is creating the Invoices. The more visits invoiced, the longer it takes. The progress bar displays the current number of invoices created/total number of invoices queued (percent complete).
When the progress bar reaches 100% and disappears, you are ready to export the claims created using the Export window.
If there is an error message saying that some visits “could not be invoiced” and the reason displays, correct the error, then complete the steps to create an invoice for those visits. Make sure to select Update in the Billing Review screen, before creating invoices.
The visits associated with the new invoice(s), now have a status of 04-Billed. If the Print Invoices Created and/or Print a Summary Report checkboxes were selected they automatically display in PDF format.
Save the Summary Report for your records to reconcile your payment from the Payor.