Sandata Agency Management Manage System Setup

To add a new company:
-
Go to the Companies window under Main Menu > Admin > System Setup > Companies.

-
Select the Add icon.

-
Use the fields to enter all required company information across all tabs.
A time must be entered in the Workday Begins field on the Payroll tab in order to complete the process.
-
Select the Save button.

To remove a company that is out of date or inactive:
-
Go to the Company window under Main Menu > Admin > System Setup > Companies.

-
Double click on the company to be opened.
-
Select the Delete option.

-
Select the Ok button.

To add a new location to the System:
-
Go to the Locations window under Main Menu > Admin > System Setup > Locations.
-
Select Add.

-
Use the fields to add the required location information.
-
Select Save.

To remove an invalid or out of date location:
-
Go to the Locations window under Main Menu > Admin > System Setup > Locations.
-
Double click on the location to be removed.

-
Select Delete.

-
Select Ok.

To add a new admission type to the system:
-
Go to the Admission Types window under Main Menu > Admin > System Setup > Admission Types.
-
Select the Add .

-
Enter the required admission type information into the fields.
-
Select the Save button.

To remove an invalid or out of date admission type from the system:
-
Go to the Admission Types window under Main Menu > Admin > System Setup > Admission Types.
-
Double click on the admission type to be removed.
-
Select Delete.

-
Select the Ok button.

To add a new attribute to the system:
-
Go to the System Attributes screen under Main Menu > Admin > System Settings > Attributes.
-
Select Add New Attribute.

-
Use the fields to enter the required attribute information.
-
Select the Save button.

To remove an invalid or out of date attribute from the System:
-
Go to the System Attributes window under Main Menu > Admin > System Settings > Attributes.
-
Double click on the attribute to be removed.
-
Select Delete.

-
Select the Ok button.

To add a new security group to the system:
-
Go to the Security Groups window under Main Menu > Admin > System Setup > Security Groups.
-
Select the Add option to add a new group.

-
Enter the name of the group.
-
Select the Ok button.

-
Use the fields to enter the Security Group information.
-
Select the Save button.

To remove an invalid or out of date group from the system:
-
Go to the Security Group window under Main Menu > Admin > System Setup > Security Groups.
-
Double click on the selected Security Group.

-
Select Delete.

-
Select the Ok button.

To add a new service to the system:
-
Go to the Services screen under Main Menu > Admin > System Setup > Services.
-
Select the icon for Add New Service.

-
Enter the service information in the fields.
-
Select the appropriate setting check boxes.
-
Select the Save button.

To update or make changes to an existing service in the system:
-
Go to the Services window under Main Menu > Admin > System Setup > Services.
-
Double click on the service needing updating.

-
Make any changes to the service as needed.
-
Select the Save button.

To remove an invalid or out of date service from the system:
-
Go to the Services window under Main Menu > Admin > System Setup > Services.
-
Double click on the service needing deletion.

-
Select Delete.

-
Select the Ok button.

To create a new position in the system:
-
Go to the Staff Positions window under Main Menu > Admin > System Setup > Staff Positions.
-
Select Add.

-
Use the fields to enter the position information as needed.
-
Select the Save button.

To make revisions or changes to an existing position in the system:
-
Go to the Staff Positions window under Main Menu > Admin > System Setup > Staff Positions.
-
Double click on the position that needs updates.

-
Use the fields to enter the position information as needed.
-
Select the Save button.

To remove an invalid or out of date position:
-
Go to the Staff Positions screen under Main Menu > Admin > System Setup > Staff Positions.
-
Double click on the position needing removal.

-
Select Delete.

-
Select the Ok button.

To add a new topic for training:
-
Go to the Topic Master screen under Main Menu > Admin > System Setup > Topic Master.
-
Select Add.

-
Use the fields to enter the topic information as needed.
-
Select the Save button.

To update or revise a topic in the system:
-
Go to the Topic Master window under Main Menu > Admin > System Setup > Topic Master.
-
Double click the topic that needs editing.

-
Update the fields as needed.
-
Select the Save button.

To remove an out of date or invalid topic:
-
Go to the Topic Master window under Main Menu > Admin > System Setup > Topic Master.
-
Double click the topic that needs to be removed.

-
Select Delete.

-
Select the Ok button.

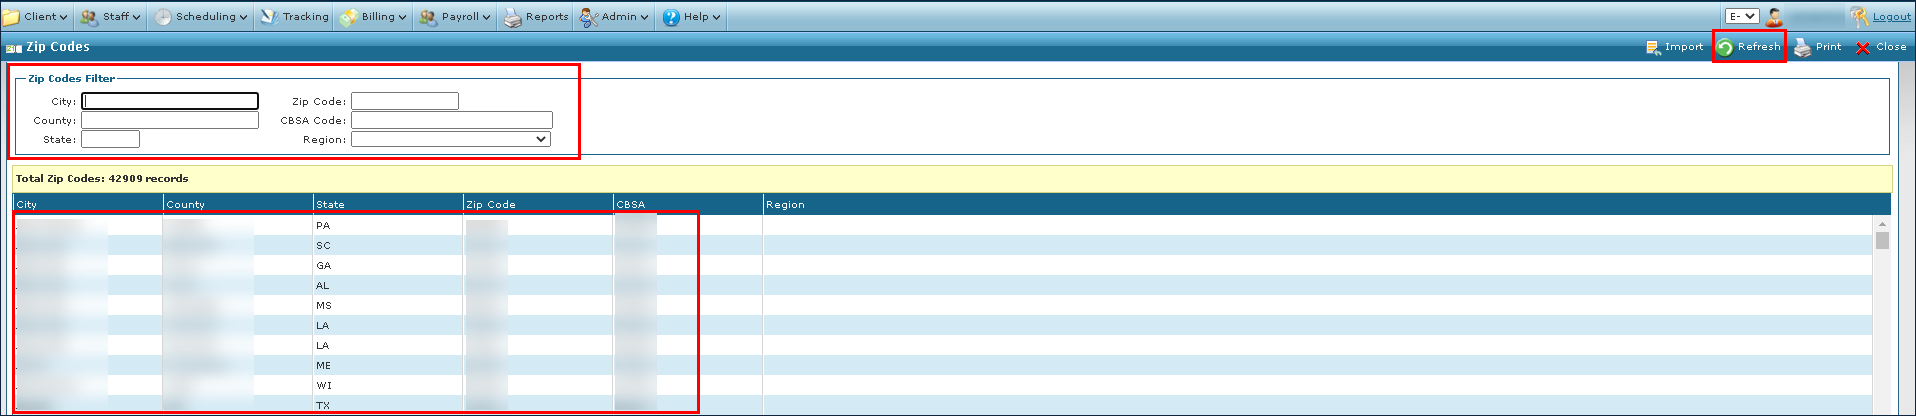
To find location information:
-
Go to the Zip Codes window under Main Menu > Admin > Lookup > Zip Codes.
-
Enter the terms in the search filters.
-
Select Refresh.
To update a Holiday in Sandata Agency Management:
-
Go to the Company window under Admin > System Setup > Company.

-
Double click on the Company to open up company profile.

- Go to the Holidays tab.
-
Locate and right click on the Holiday to be added.

-
Select the Copy Holiday to Next Year button. This will create a new line with the holiday.

-
Update the Holiday’s title, begin, and end dates if necessary. To update the date, click on the date and a calendar will appear. Update the dates from the calendar.
The Begin Date will begin on the holiday date, with Begin Time set to 00:00:00. The End Date will follow the day AFTER the holiday, filled with End Time of 00:00:00. This is to capture the full 24 hours.
-
Select the Global check box.
-
Select the Save button.

To add a new value item to the system:
-
Go to the Value Items window under Admin > System Setup > Value Items.
-
Select the section to add the value item.

-
Select Add.
-
Use the fields to enter the value item information as needed.
-
Select Save.
To make changes or update a value item in the system:
-
Go to the Value Items window under Admin > System Setup > Value Items.
-
Select the section with the value item.

-
Edit the value item information as needed.
-
Select Save.
To remove an invalid or out of date value item:
-
Go to the Value Items window under Admin > System Setup > Value Items.
-
Select the section with the value item.
-
Select the value item.
-
Select Delete.

-
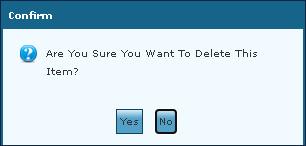
Select the Yes button to confirm the change.
-
Select Save.

To set up No-Show Alerts:
-
Select the Email Alerts checkbox under Features Management > Admin > System Setup > Email Alerts.

-
Set the Warning Threshold Time in the Warn when calls have not been received within minutes field under Main Menu > Admin > System Settings > Santrax.

-
Select Services under Main Menu > Admin > System Setup > Services.

-
Select the Do not send alerts for this Service checkbox for all services not requiring e-mail alerts.

-
Confirm all Coordinators have phone numbers and e-mails listed under Staff > Personal > Phone Numbers, Etc. > E-mail.

-
Confirm Clients are assigned a Coordinator under Main Menu > Client > Chart > General > Coordinator.

With the recent federal mandate of COVID-19 vaccinations for frontline workers who interact with Medicaid and Medicare Clients, Sandata Agency Management can be used to track, report, and manage all requirements/compliance items for your Caregivers. This applies to both onboarding and annual certifications.
This topic explains how to use the Compliance feature of Sandata Agency Management for tracking COVID-19 vaccine compliance.
To add COVID-19 compliance items:
-
Go to the Compliance window under Main Menu > Admin > System Setup > Compliance.
-
Select Add.
-
Enter the tracking information for vaccine #1.
-
Select the Comment Required checkbox so a manufacturer can be added.
-
Add a Declined result code.
-
Select the Save button.

-
Go to the Compliance window under Main Menu > Admin > System Setup > Compliance.
-
Select Add.
-
Enter the tracking information for vaccine #2.
-
Select the Comment Required checkbox so a manufacturer can be added.
-
Select the Is Result Code checkbox.
-
Select the Savebutton.

-
Go to and open the vaccine #1 compliance item.
-
Add Complete in the Result field.
-
Enter COVID-19 Vaccine 2 in the Result Code field.
-
Enter 30 in the Exp In field.
-
Select Days from the Exp Period dropdown.
-
Select Yes in the Stop Recurringdropdown.
-
Select the Savebutton.


-
Go to and open the position under Main Menu > Admin > System Setup > Positions.
-
Select the position requiring the compliance item.
-
Select the Add icon.
-
Select vaccine #1 and vaccine #2.
-
Select the Savebutton.

-
Go to and open the staff member’s profile and compliance documents under Main Menu > Staff > Search Staff > Compliance.
-
Select the Add icon.
-
Select Vaccine #1 as the Item.
-
Select Complete or Refused from the Complete dropdown. Selecting Complete auto populates the Vaccine #2 item with a renewal date 30 days from the completed date. Selecting Refused closes the item.
-
Select the manufacturer from the Comment dropdown.
-
Select the Savebutton.

When vaccine #1 is completed, vaccine #2 remains compliant until the renewal date has passed, at which point it can be updated and completed.